How to Use LUTs in Lightroom & Photoshop
LUTs are commonly used by video editors in the post-production process for color grading. But, did you know that you can use LUTs in Lightroom and Photoshop to enhance your photos as well?
Just like how you use Photoshop actions and Lightroom presets to quickly transform the looks of photos, LUTs are also useful for instantly optimizing photos and even applying filters.
In this quick guide, you’ll learn more about LUTs, what they are, and where to download LUTs. Using LUTs is also quite easy, we’ll show you how to use them in Photoshop and Lightroom with step-by-step instructions.
Let’s dive in.
What are LUTs?
LUTs (Lookup Tables) is a term that refers to a computation process in computer science. But, when it comes to photography and videography, LUTs are used for color grading.
In photography, LUTs are mainly used to give a specific look to your photos. For example, if you want to add a cinematic look to your photos, you can use a LUT to apply that look without having to adjust any color settings.
LUTs will help you speed up your post-processing workflow and save a lot of time that otherwise goes into manually making adjustments. They will especially be useful when processing big batches of photos, like photoshoots and wedding albums.
Different Types of LUTs
There are many different types of LUTs you can use to achieve different outcomes. But, you’ll often come across two main types of LUTs called 1D LUTs and 3D LUTs.
1D LUTs only use one value setting to optimize the look of a video or photo. 3D LUTs use three values, brightness, hue, and saturation, to make more impactful changes.
If you’re new to design and photography, don’t think too much about the technical side of a LUT. Think of them as filters for photos. You can also check out this video if you need further clarification.
Where to Download LUTs
A great thing about using LUTs is that you don’t have to create them yourself. You can also download and use LUTs created by other professionals.
There are many websites and marketplaces you can use to download LUTs. Here are just a few suggestions.
- Envato Elements: This is our favorite place to download LUTs as it gives you unlimited access to the platform for a single price
- GraphicRiver: If you just want to download one or two LUTs, this marketplace has ones at affordable prices
- Behance: If you can’t afford premium LUTs, you can search Behance to download free LUTs uploaded by other creatives like you
- FreePresets: This site also has a good collection of LUTs you can download for free.
10 Examples of Lightroom & Photoshop LUTs to Download
Before we get to the tutorial, you should download a couple of LUTs so you can follow the steps as we explain them. You can grab a free preset if you’re low on budget. But, if you want to create professional looks, we recommend using premium LUTs bundles.
Here are a few great examples of premium LUTs you can download.
50 Matte LUTs Pack for PS & Lightroom
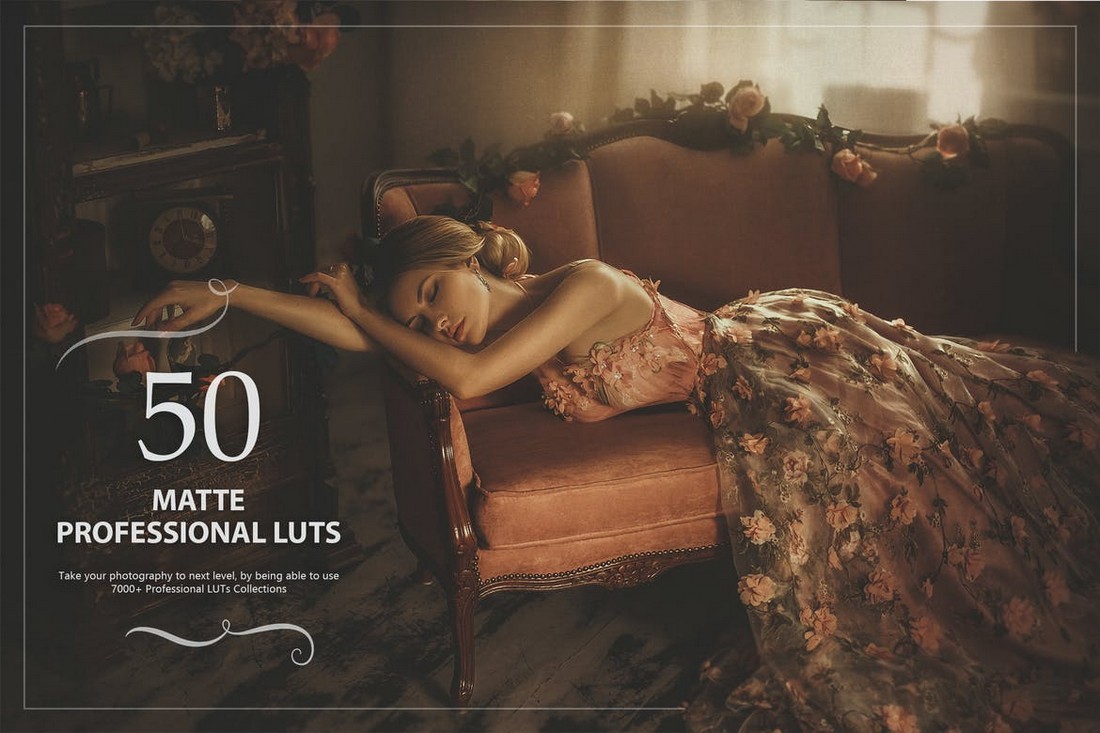
This bundle features a collection of LUTs that will add a matte effect to your photos. They will work great with your indoor and outdoor portrait photos.
20 Cinematic Vibes LUTs Pack
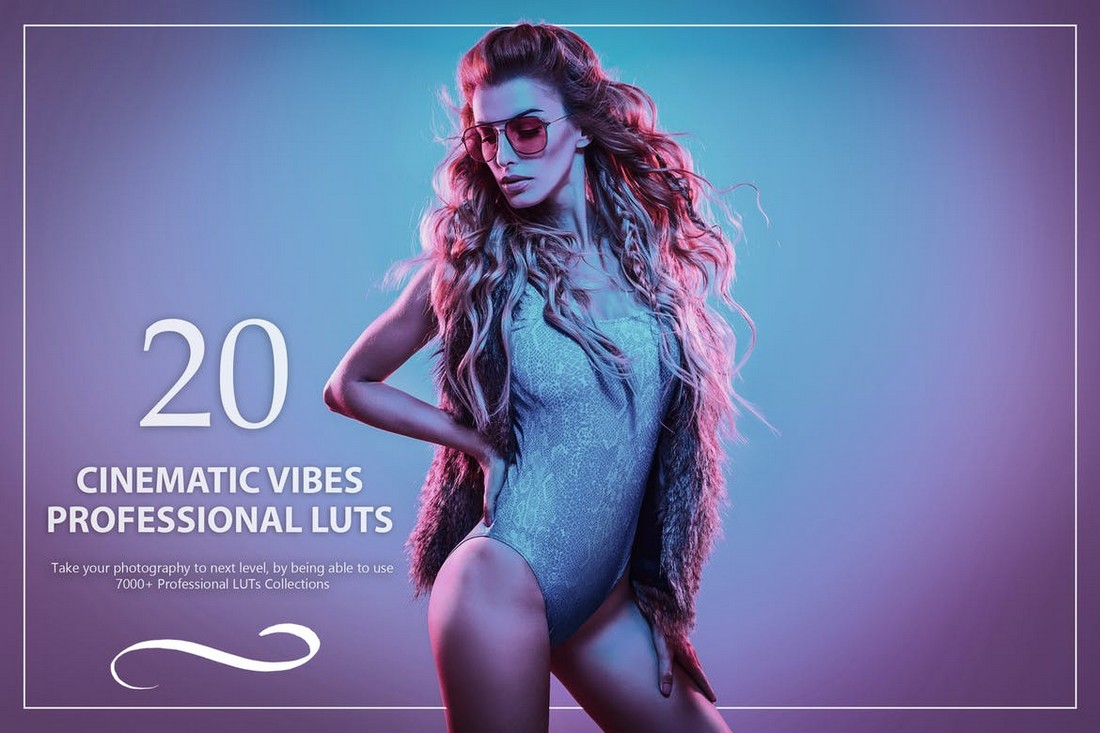
You can add a modern cinematic vibe to your photos using the LUTs in this pack. They are compatible with all popular video and photo editing software.
20 Tropical LUTs for Lightroom & Photoshop
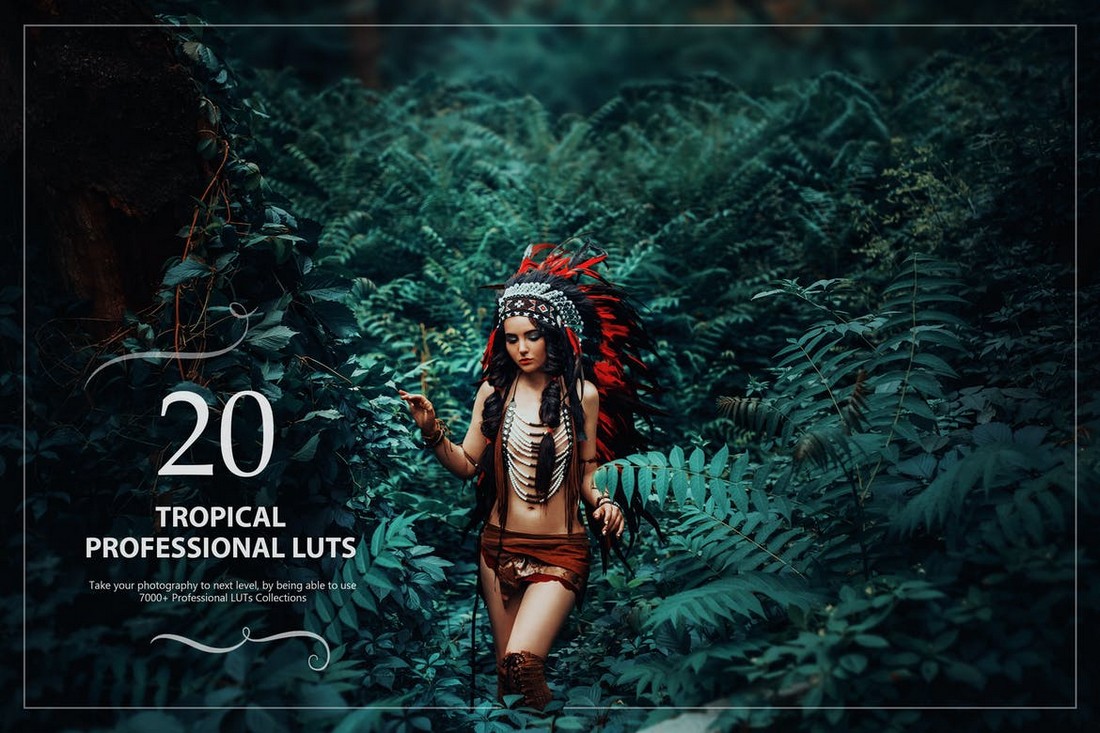
The LUTs in this pack are most suitable for photos shot in outdoor settings. They will make your photos look much more professional than ever before.
50 Nostalgia Wedding LUTs Pack
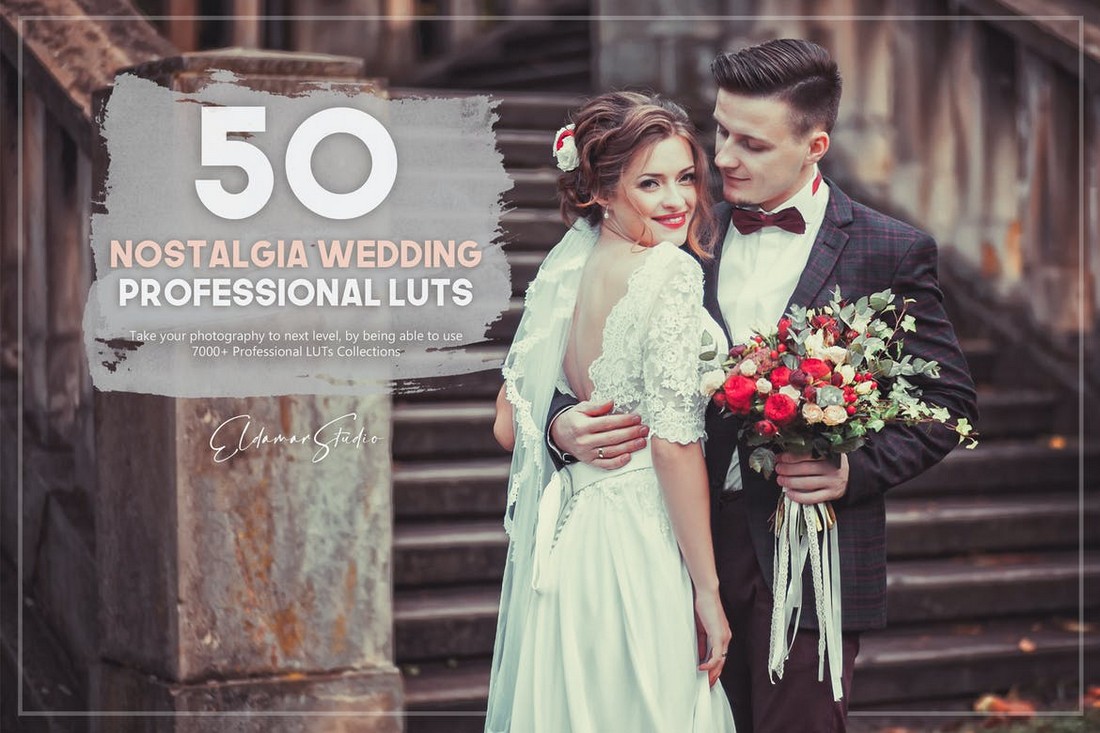
LUTs are most useful when processing wedding photography. This bundle includes lots of choices for optimizing your wedding photos.
20 Cyberpunk Effect LUTs Pack

Want to add a futuristic cyberpunk look to your photos and graphics? Then this LUTs pack is perfect for you.
20 Red Forest Lightroom Presets & LUTs

This is a bundle of Lightroom presets that adds a unique red filter to photos. It also includes LUT versions of the effect for you to use in Photoshop.
50 Pastel Wedding LUTs Pack

You can add a subtle pastel effect to your wedding photos using this pack of LUTs. They are compatible with Lightroom, Photoshop, Affinity Photo, and more.
21 Nostalgia LUTs Pack
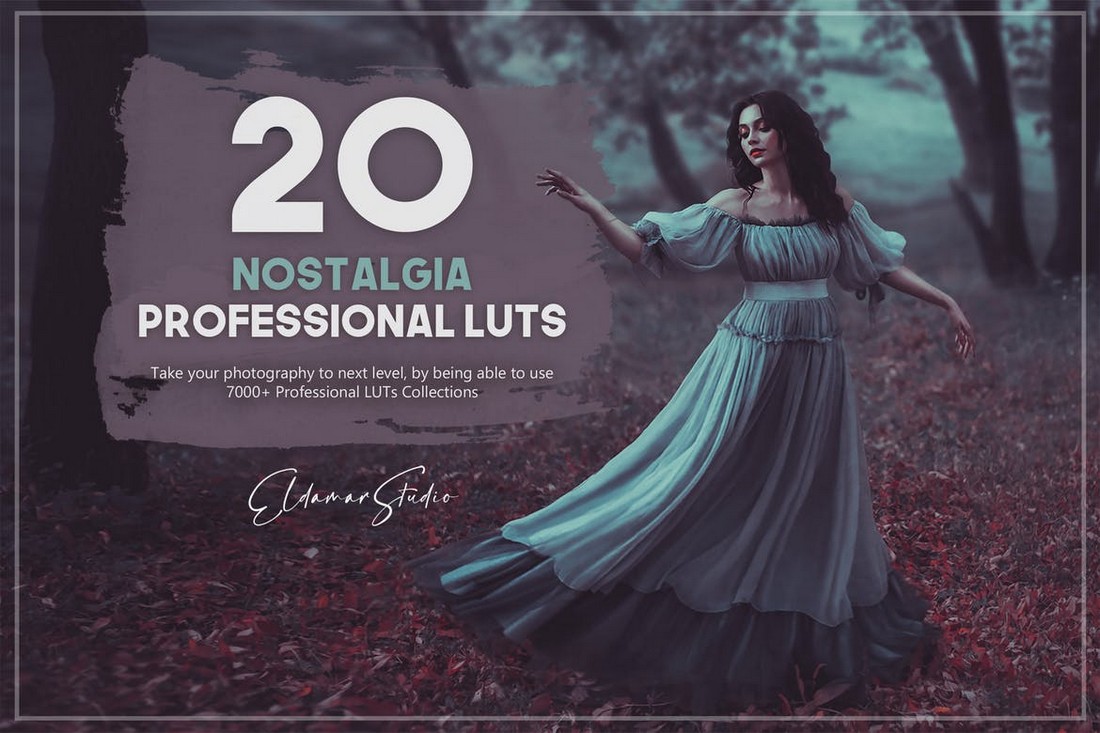
The LUTs in this pack are designed to give your photos a nostalgic look and feel. They will work best with outdoor photos.
50 Illuminate Lightroom Presets and LUTs
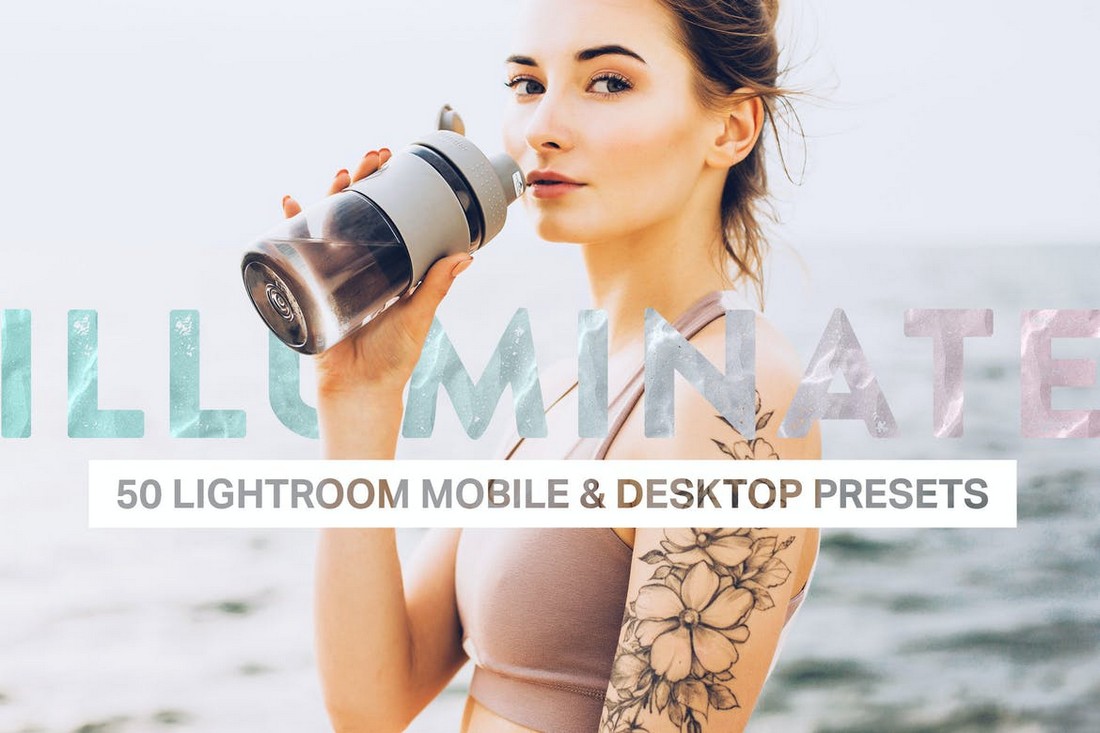
This is a massive bundle of Lightroom presets and LUTs you can use to enhance all kinds of portrait and landscape photos. It includes 50 Lightroom presets and 50 LUTs.
20 Blossom Beauty LUTs Pack
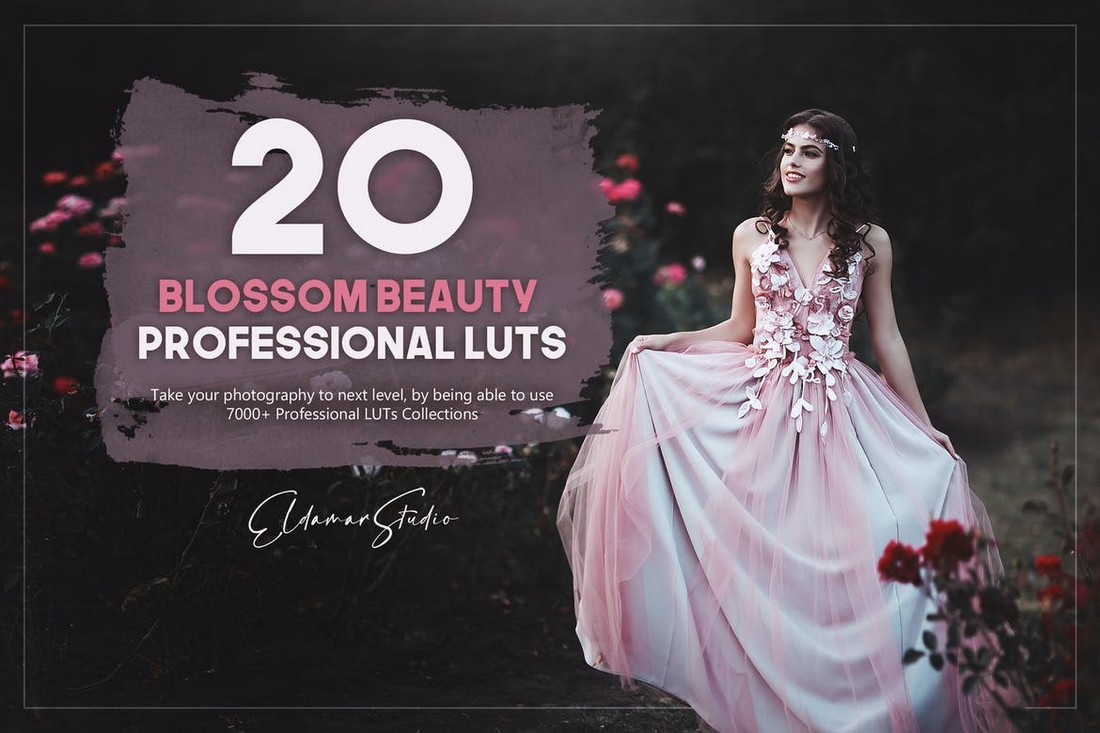
You can use this collection of LUTs to make your outdoor photos more colorful and beautiful. They are ideal for wedding photography as well.
How to Use LUTs in Photoshop
Now, let’s get to the fun part of the article. Before getting started, make sure to download a LUT so you can follow along with the steps below.
Step 1: Extract the ZIP File
Your downloaded LUTs will come in a ZIP file. So the first thing you should do is extract the LUTs in the ZIP file.
Simply right-click and select Extract or Unzip. And then open the extracted folder to find the LUTs.
LUT files usually arrive in .CUBE file format.
Step 2: Install LUTs in Photoshop
To Install LUTs in Photoshop, you need to copy the LUT files into the Photoshop installation folder.
Navigate to this folder on PC C:\Program Files\Adobe\Adobe Photoshop 2021\Presets\3DLUTs
Or /Application/Adobe Photoshop/Presets/3DLUTs on Mac
Then copy your .CUBE LUT files over to this folder.
Step 3: Use LUT in Photoshop
Now open a photo in Photoshop. LUTs work best on high-resolution photos, especially on RAW files.
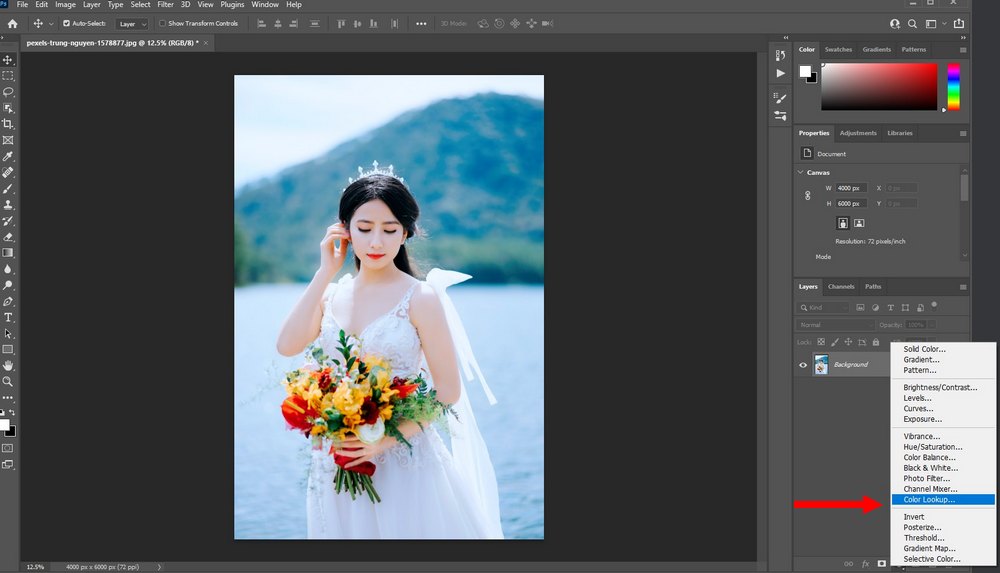
If you already had Photoshop opened, restart the app. And create a new Color Lookup adjustment layer.
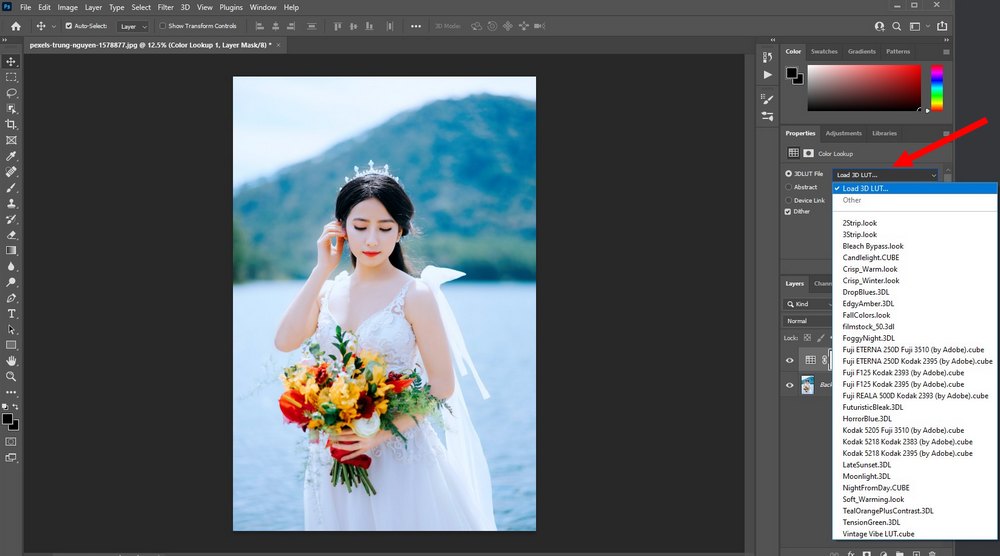
Select the Color Lookup layer and click on the Load 3D LUT menu in the Color Lookup properties tab.
Select any one of your newly installed LUTs to apply the effect to your photo.
Step 4: Adjust the Effect to Your Preference
If the LUT you’ve applied seems to alter the photo a bit too much, you can adjust the strength of the effect to your preference.
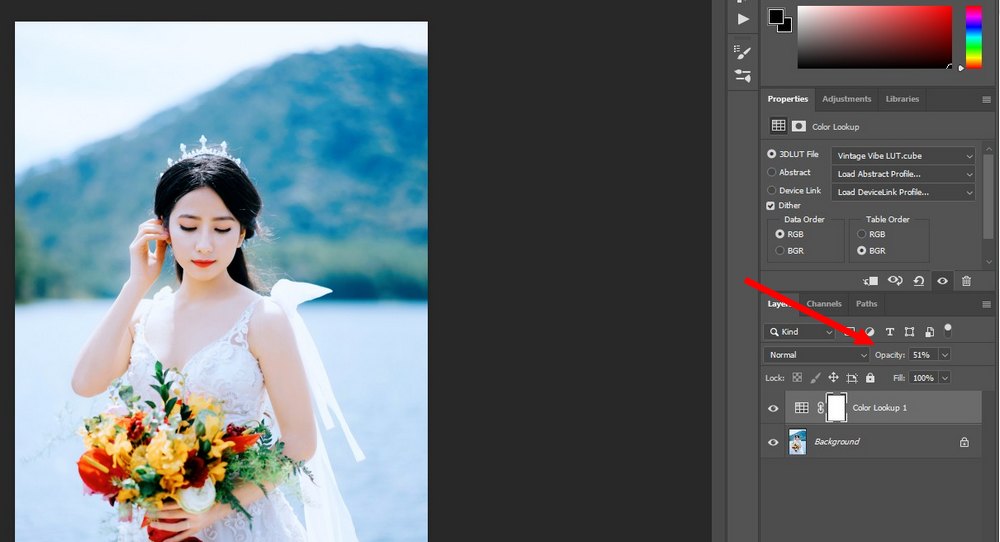
Select the Color Lookup layer from the layers panel. And adjust the opacity until you get the look you like.
How to Use LUTs in Lightroom Classic
Using LUTs in Lightroom takes a little bit more work than Photoshop. You can’t directly import LUTs to Lightroom so you have to save them via Camera RAW.
Here’s how it works.
Step 1: Create a Preset with the LUT
Open a photo in Photoshop Camera RAW. You open Camera RAW via Bridge or from Photoshop. All RAW files are opened via Camera RAW.
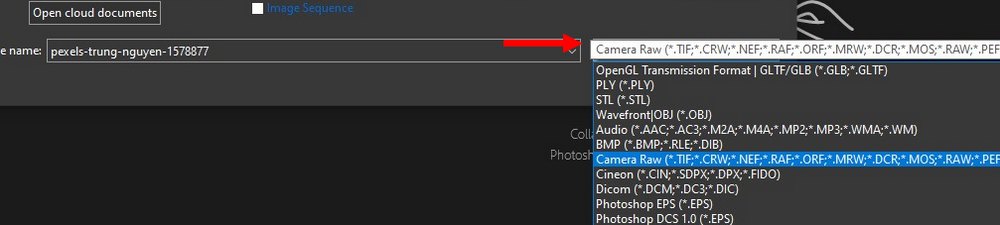
Or you can go to File >> Open As >> And select Camera Raw from the drop-down menu.
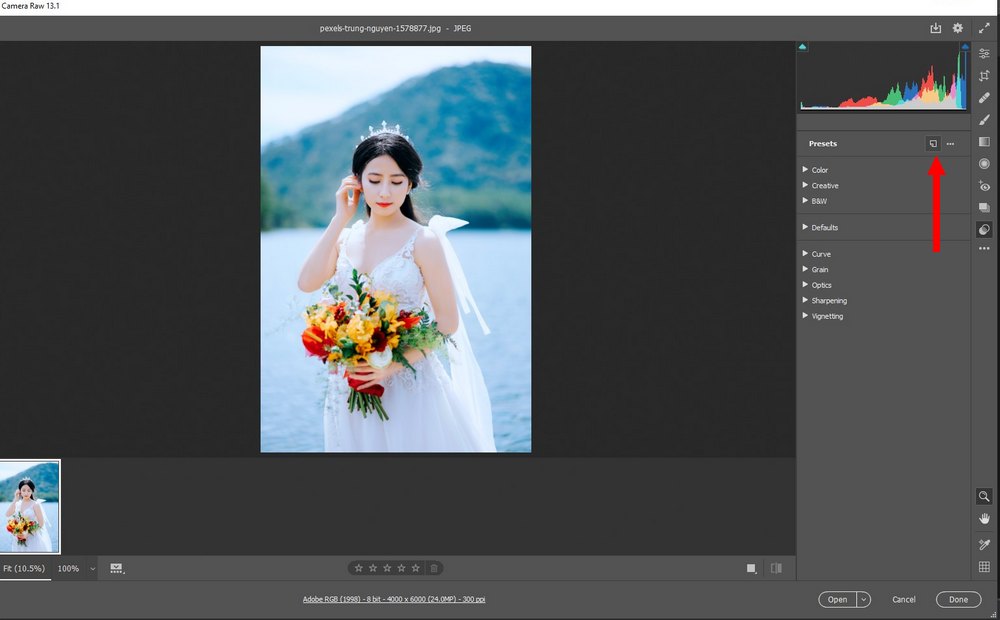
Once you’re on Camera RAW, switch to the Preset tab.
Then click on the Create New Preset button while holding the Option / Alt key on your keyboard.
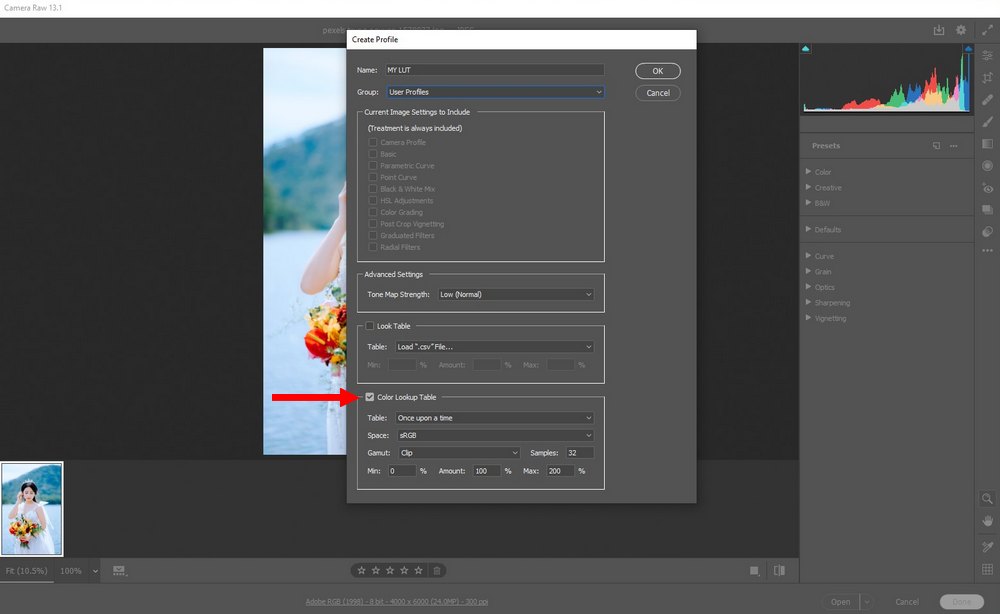
This will open a new window for creating new user profiles. At the bottom of this window, you’ll find a section called Color Lookup Table.
Tick the box in this section and it will ask you to load a LUT. Browse to the location of your downloaded LUT and open it.
Now give the profile a name and click OK to save.
Step 2: Apply LUTs in Lightroom
Now open a photo in Lightroom. If you had the app opened, relaunch it.
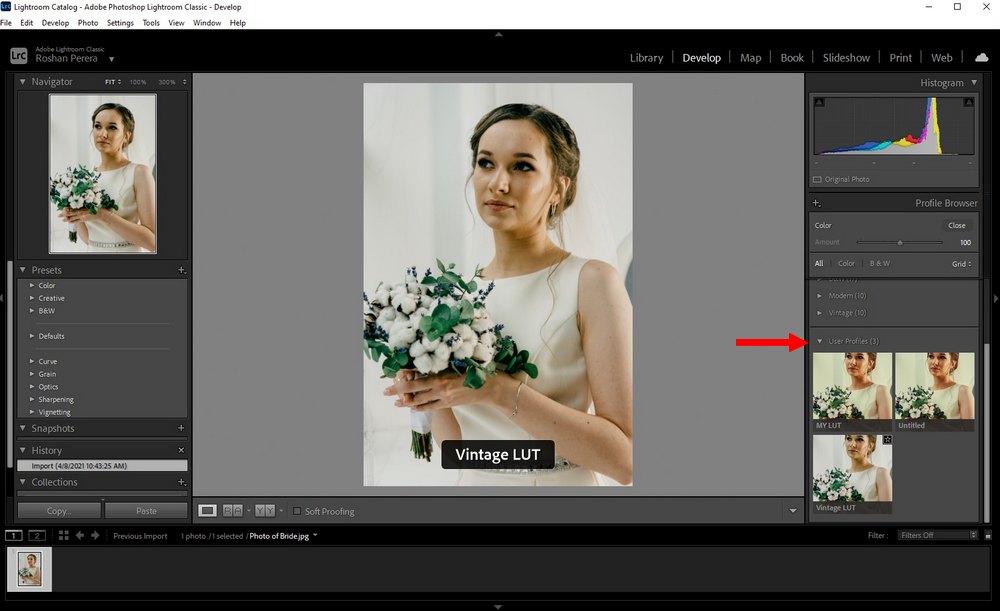
Switch to the Develop tab and go to Profile Browser. You will now see your new LUTs in the User Profiles section. Simply click on the profile to apply it to your photo.
How to Use LUTs in Lightroom CC
The above method doesn’t work with Lightroom CC. So make sure to download LUTs in XMP file format if you want to use them in Lightroom CC.
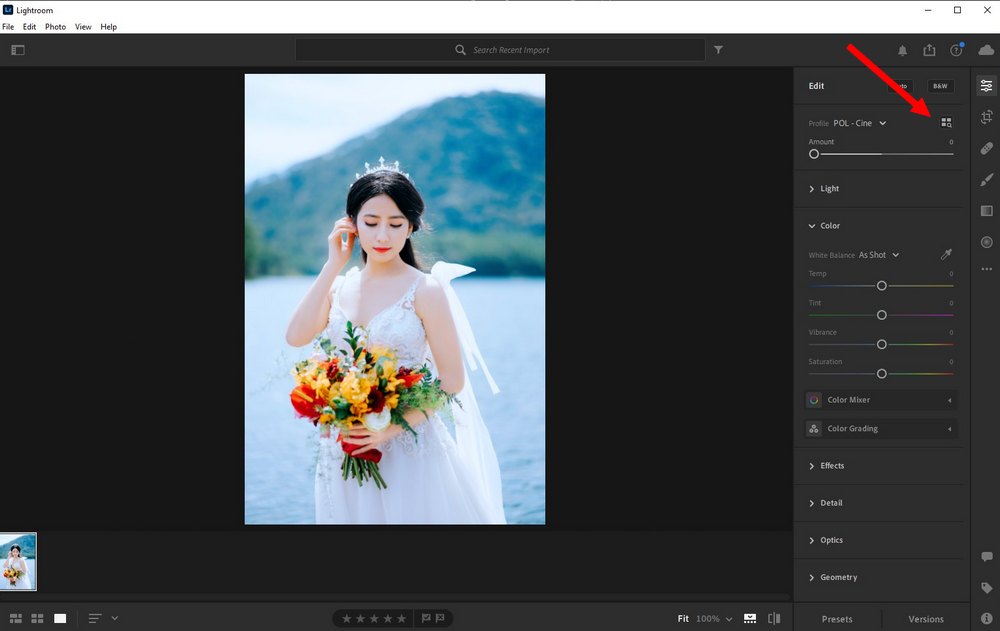
To install XMP files in Lightroom, simply open the Edit tab and then click on the Browse All Profiles button.
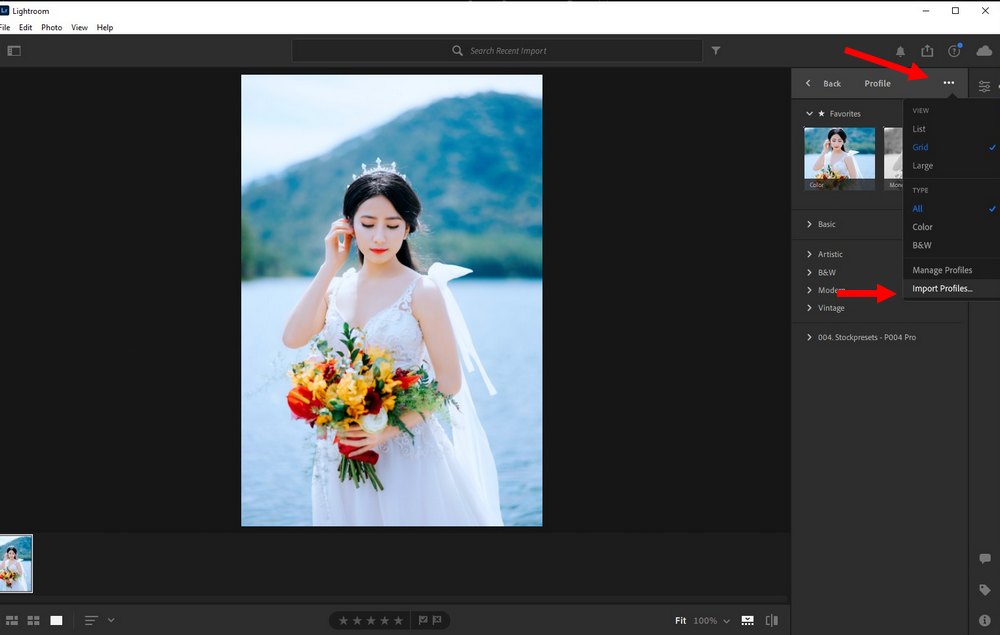
Then click on the three dots on the top-right corner and select Import Profiles.
Navigate the folder where you have the XMP LUT files and open them.
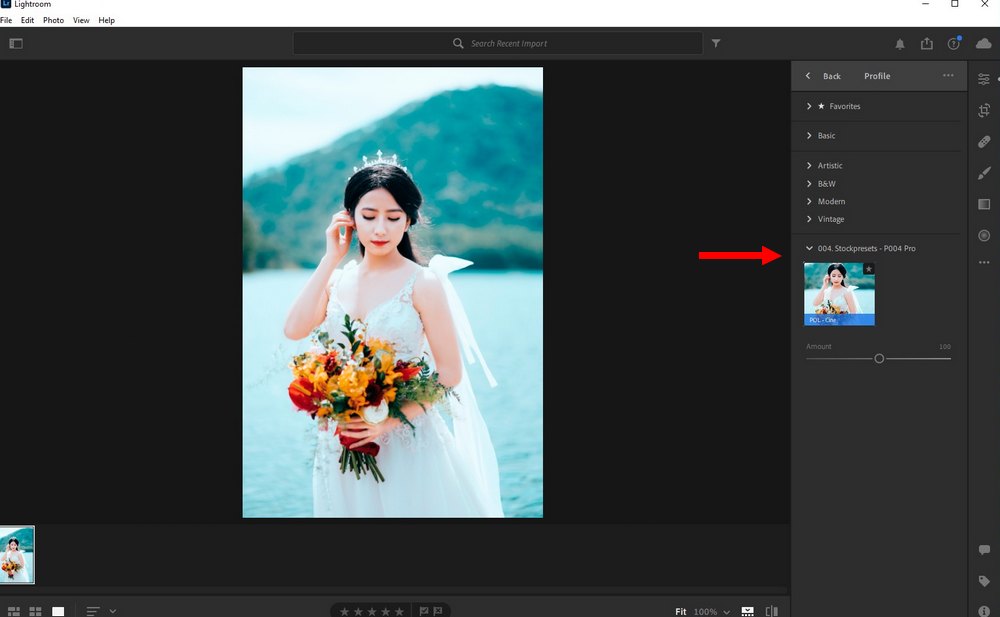
The installed LUT will appear at the bottom of the profile browser. You can apply them and adjust the strength from there.
In Conclusion
LUTs are much easier to use in Photoshop than in Lightroom. If you’re having a tough time using them, you should try using Lightroom presets instead.
Lightroom presets are much easier to install and use. And they allow you to adjust the effects to your preference using the tools already available on Lightroom.