How to Use, Install & Change Tumblr Themes
So you’ve bought a brand new and beautiful premium theme for your Tumblr blog but you’ve no idea how to install Tumblr themes? We’ll help you with that. In this post, we’ll show you exactly how to change a Tumblr theme and install a Tumblr theme from scratch with step-by-step instructions.
Installing a theme from the Tumblr themes directory is fairly an easy process. You just find a theme you like and click on that green Install button. But, the process is different for themes that you buy or download from a third-party marketplace. We’ll get to that in a moment.
First, we’ll show you how to use a theme from the Tumblr themes directory!
How To Change Tumblr Themes
Here’s how you can change your default theme into a different theme from the Tumblr themes directory.
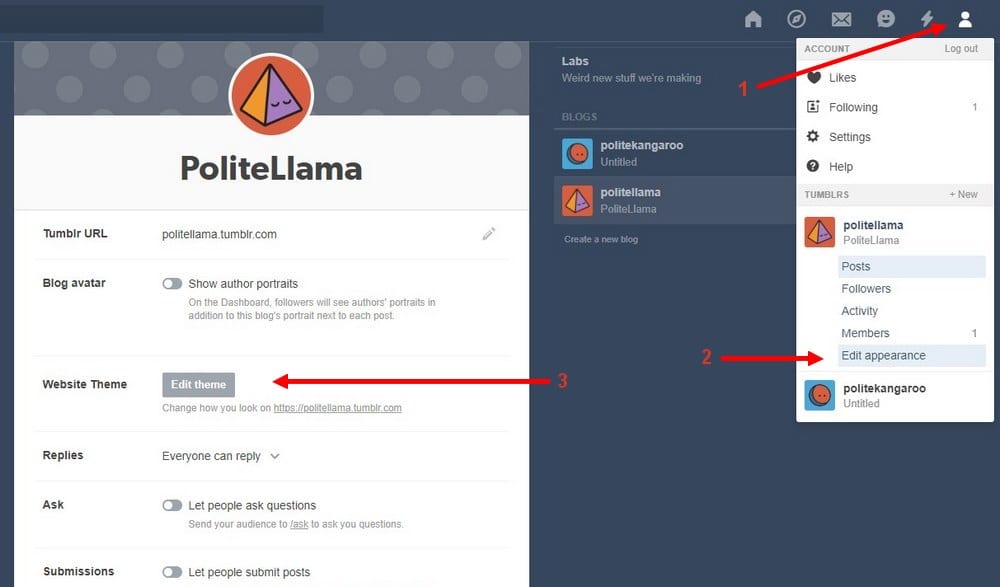
Step 1: Click on the Account icon on the top-right corner.
Step 2: Select Edit Appearance.
Step 3: Then click on Edit Theme button
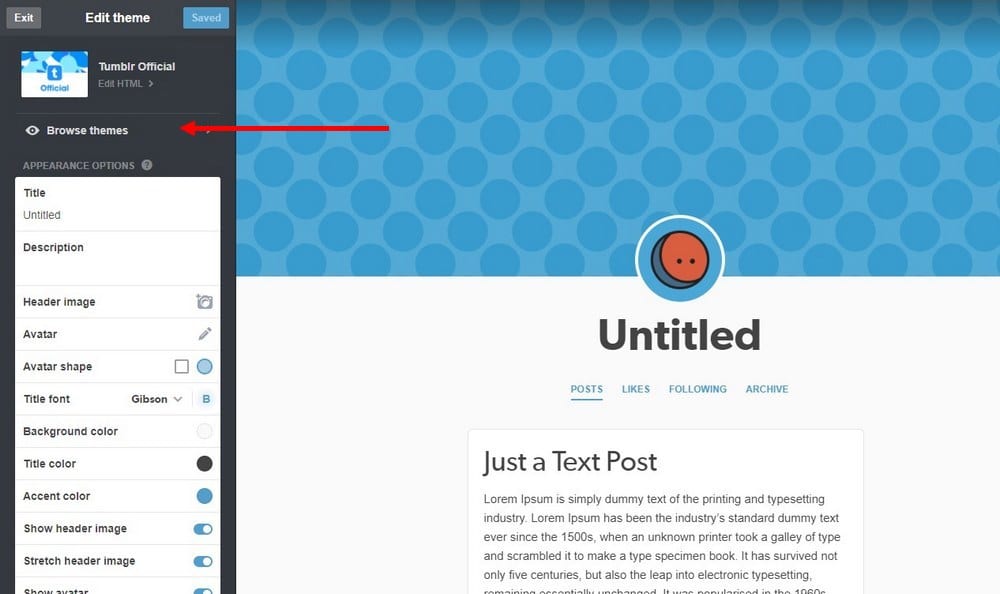
Step 4: Click on Browse Themes.
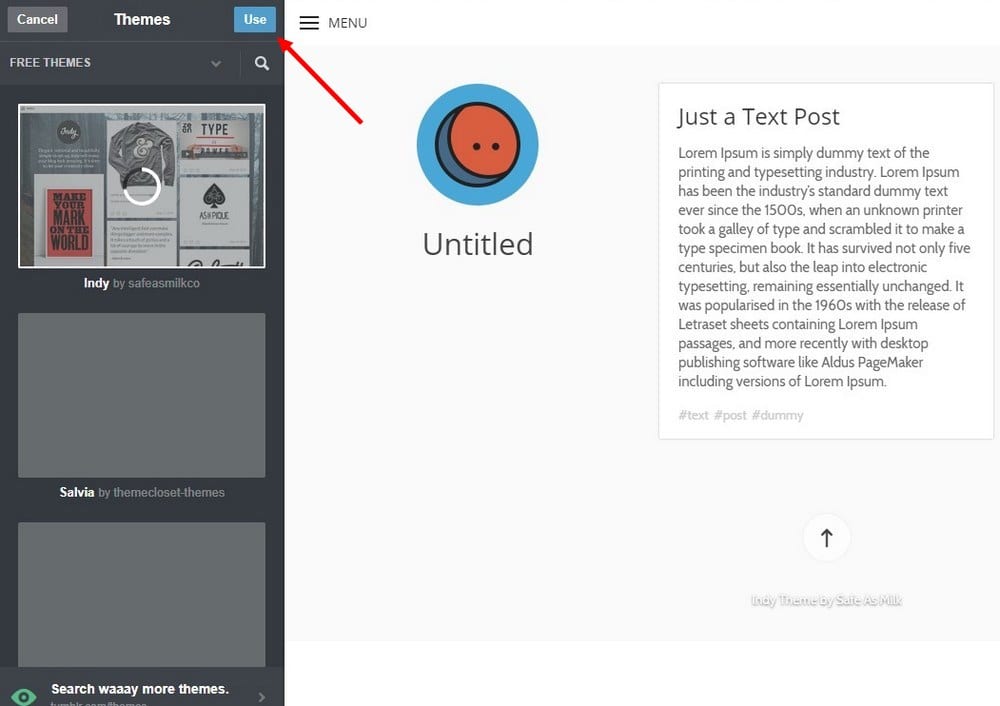
Step 5: Find a theme you like from the directory. Select the theme you like and click on the Use button
That’s it! You should be able to see a brand new design on your blog.
How To Install Tumblr Themes
Now, let’s say that you’ve bought a high-quality premium theme from a third-party marketplace like Themelantic. Installing these premium themes requires a little bit of extra work.
Here’s how it’s done.
Note: Before you make any changes to your theme, make sure to keep a backup of your theme, just in case.
Step 1: Once you download your theme .ZIP file from the theme marketplace, extract its content.
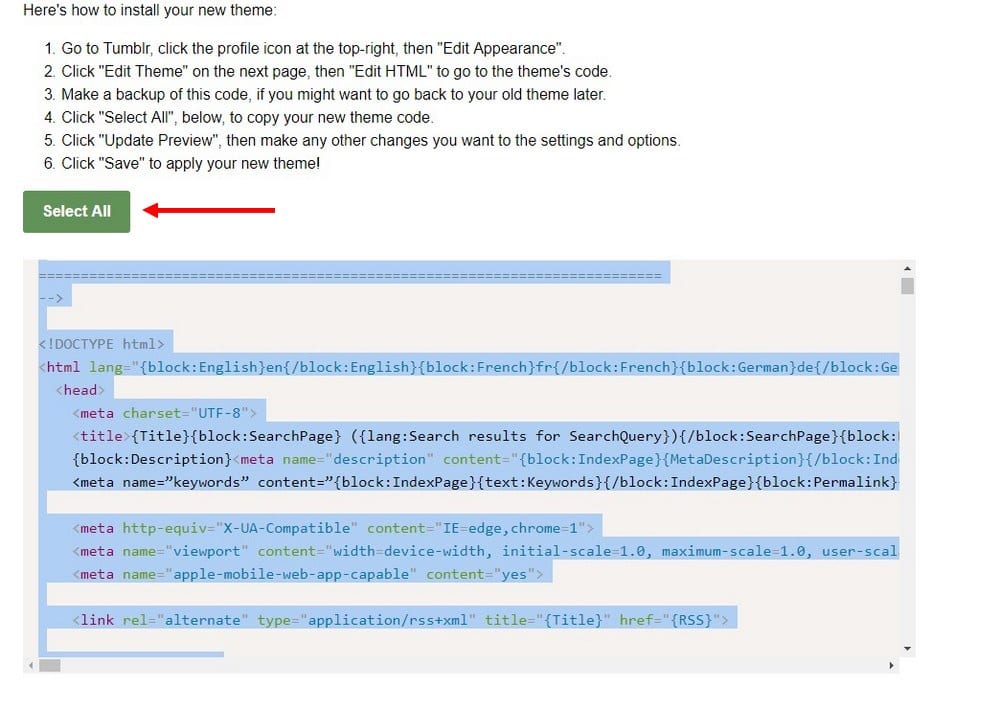
Step 2: If you’ve bought the theme from a premium marketplace like Themelantic, then you’ll find an HTML file inside the extracted folder titled “Install”. Open this file using your browser (eg: Chrome, Firefox).
If the .ZIP file doesn’t have an Install.html file, simply find the main .html file containing the theme code and open it using a code editor. We recommend using Brackets for this job.
Step 3: Select all code in the .html file and hit CTRL + C to copy the code.
Step 4: Go back to your Tumblr dashboard and open the theme editor by clicking on the Account icon on the top-right corner, click Edit Appearance, and click Edit Theme button
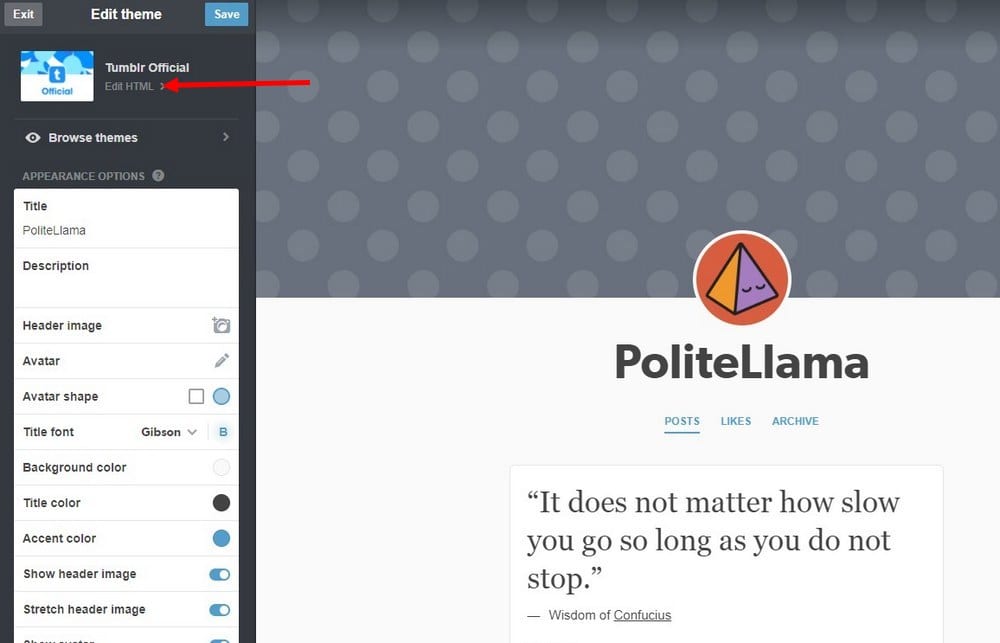
Step 5: Click on Edit HTML. Select all code in the HTML window and delete it (remember to backup the code before deleting).
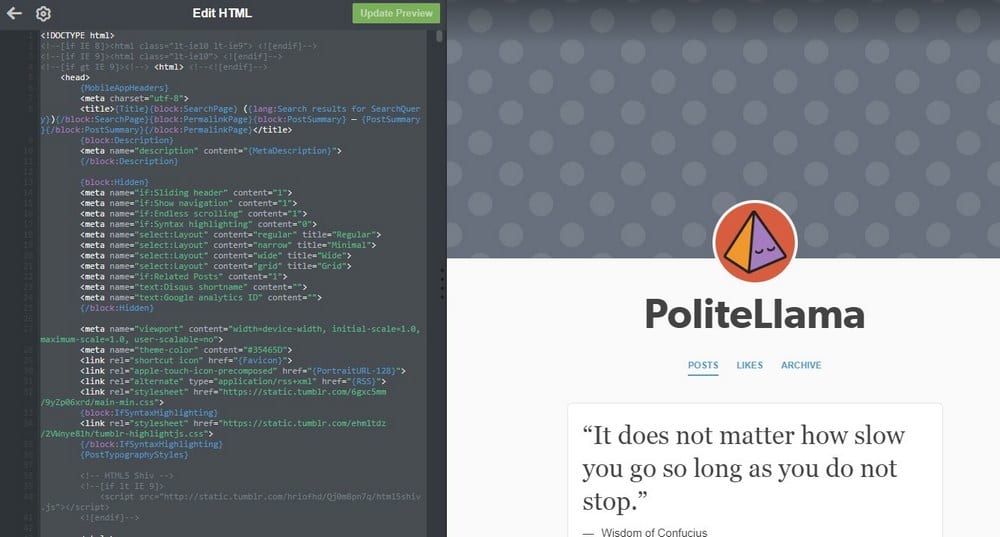
Step 6: Then paste the theme code that you copied from the Premium theme .html file into the Tumblr editor.
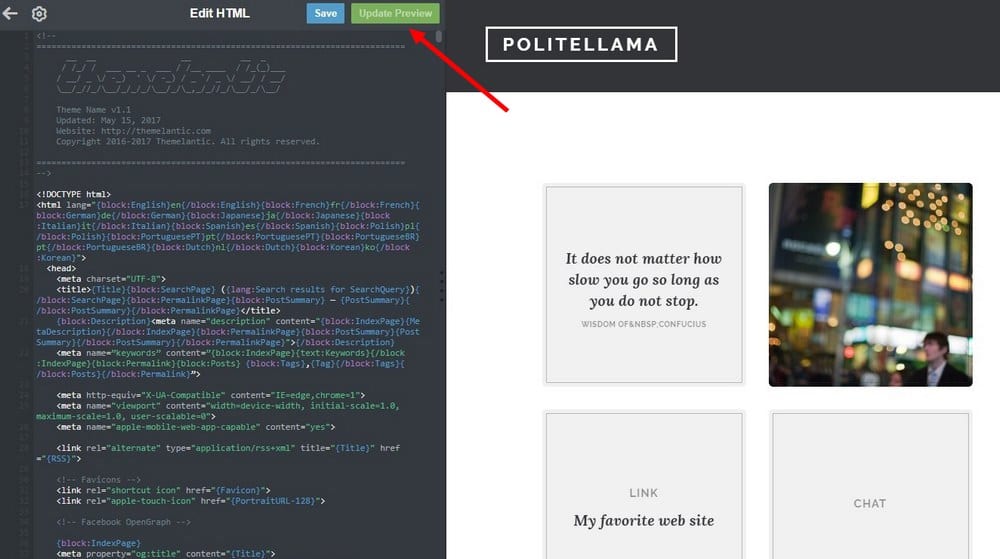
Step 7: Click Update Preview button and see how the theme looks. To keep using this new theme, click the Save button.
After finishing the installation, you can customize the theme to your preference.
How To Use Tumblr Themes
Premium themes are much more customizable than free themes. You’ll be able to add sliders, header backgrounds, logos, add widgets, change colors, enable infinite scroll, create tag menus, and much more.
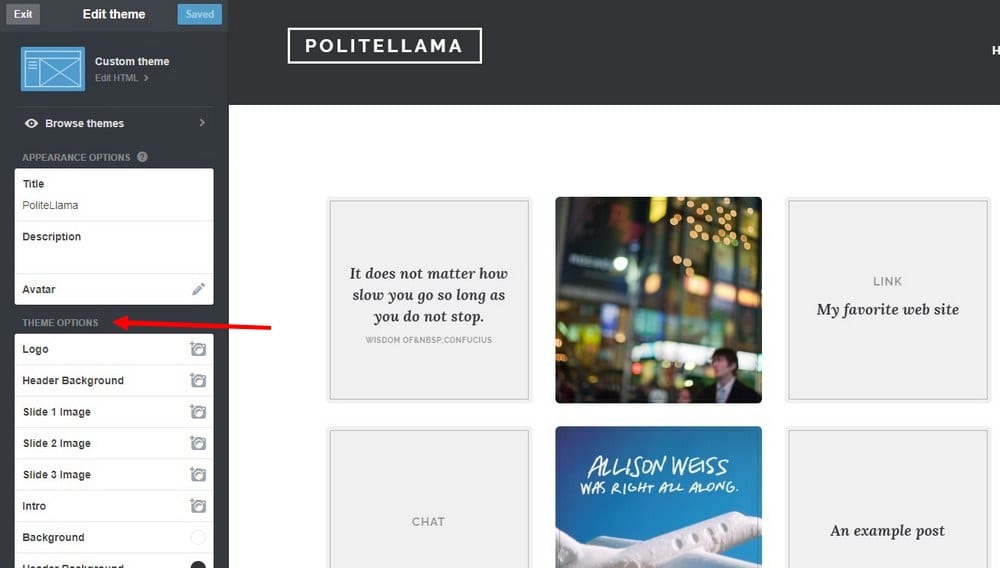
To use all these customization options, go back to the Edit Appearance window from your Tumblr dashboard and edit the settings however you like.
Summary
It may seem like a lot of work at first, but installing a theme can be done in a few simple steps. You’ll also notice that premium themes offer lots of options for you to customize the appearance of your Tumblr blog to truly personalize it to make it look unique.
It will help you create a more authentic Tumblr blog that stands out from the crowd. If you’re still looking for a great theme, be sure to check out our other Tumblr themes collections and content!