How to Create a Memorable Instagram Visual Style with Filtertune
It’s becoming more difficult to stand out on Instagram. The platform now publishes 1000 new posts every second, on average. People see so many posts each day, you need to find a way to be different so people will remember you.
One way to accomplish this is by creating a distinctive Instagram style. Over time people will recognize the visual elements and associate them with your brand. It’s an extra layer of branding to make people stop scrolling for your images even when you aren’t in the photo yourself.
The best app to use for this is Filtertune, because of its array of options and their community focus. As you’ll see, they have other features which make creating your own unique instagram style quick and easy. You can download the app here for iPhone.
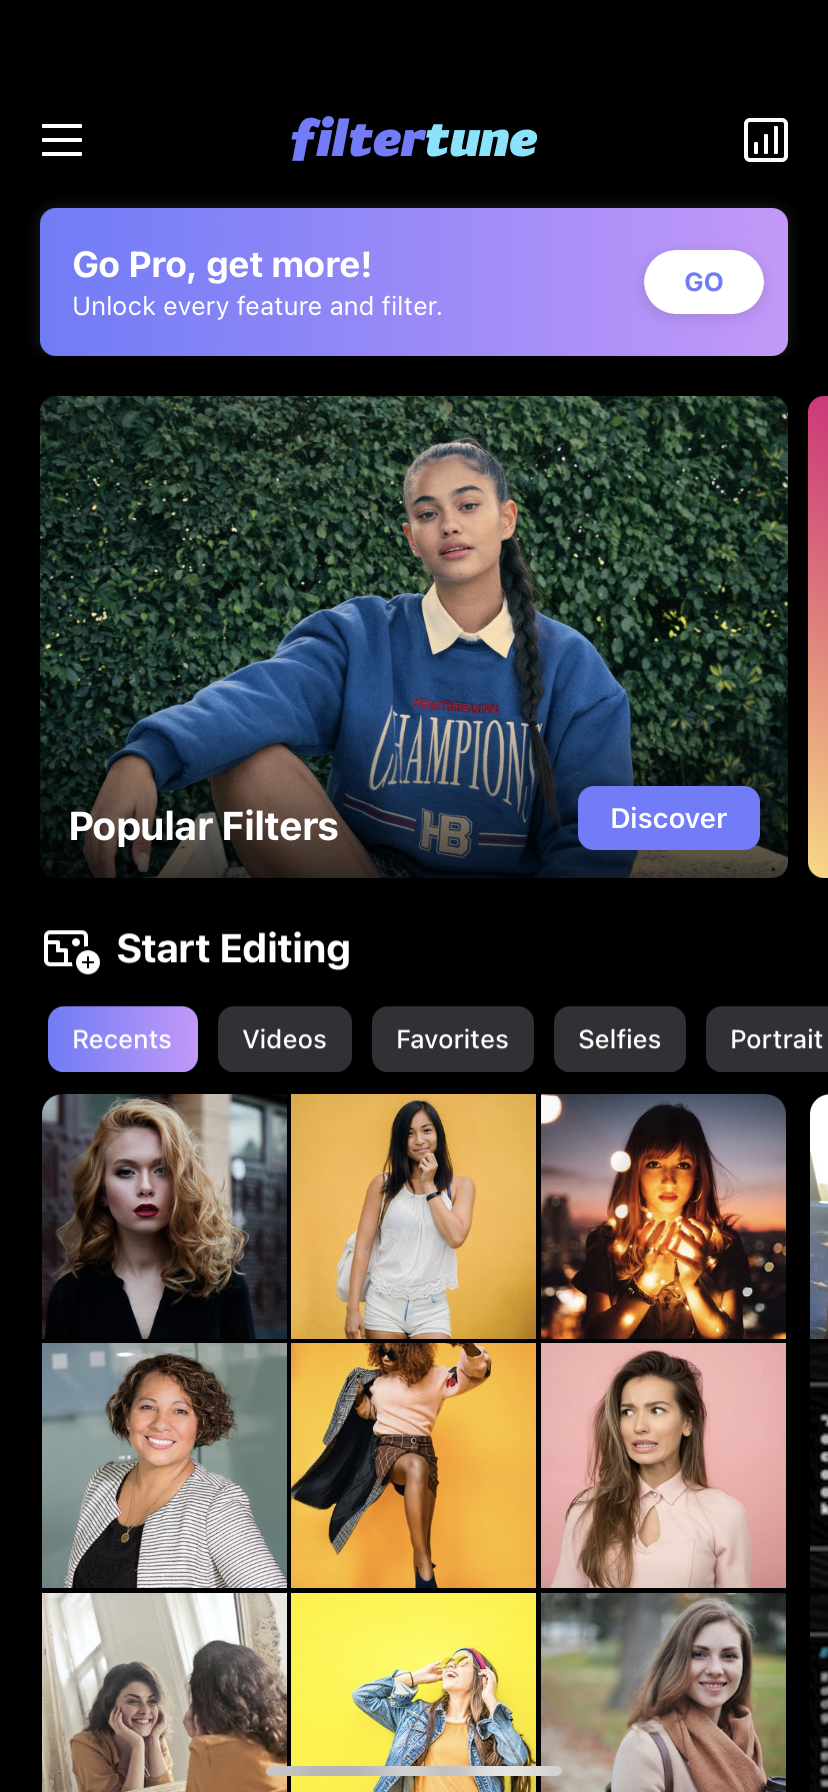
When you log into the app for the first time, you see the screen below. You can see the latest photos from your camera roll split into different sections. To start, though, we want to find inspiration, so click on the banner which says “Popular Filters.”
You’ll be taken to the “Discover” screen, where you can see filters created by members of the Filtertune community. These are usefully broken down into different categories such as “Popular” and “New.” You might find your perfect filter in here, or you may see something that simply sparks an idea for something you wish to create on your own.
You may have noticed that on the “Discover” screen, all the filters are being displayed as previews applied to the most recent photo from my device’s gallery. This is a huge time saver, as you can quickly assess multiple options without needing to press anything.
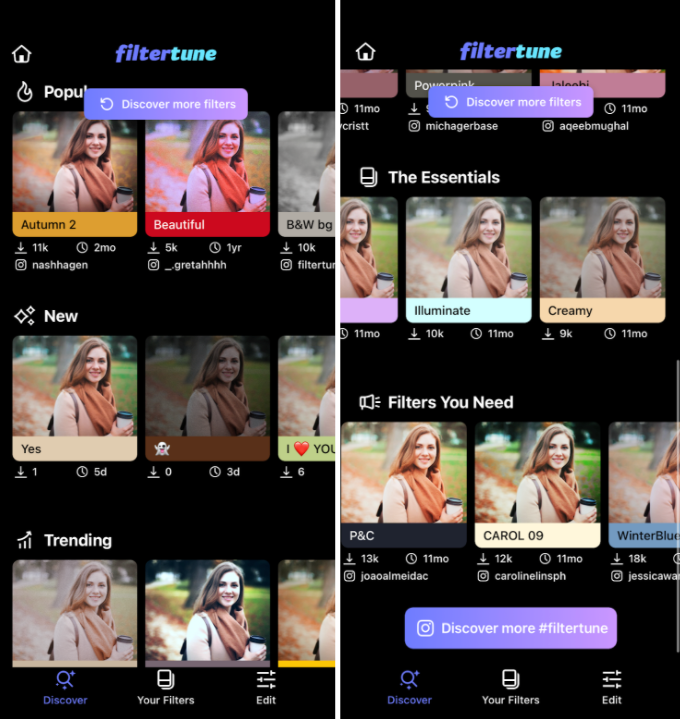
On each individual filter, you can see useful statistics such as how many views the filter has had and how many downloads. You may choose to go with the safety of the masses or pick one more niche because you want to be more original.
Some creators choose to connect their Instagram profiles to their Filtertune presences, so if you like their eye for aesthetics, you can choose to follow them for inspiration.
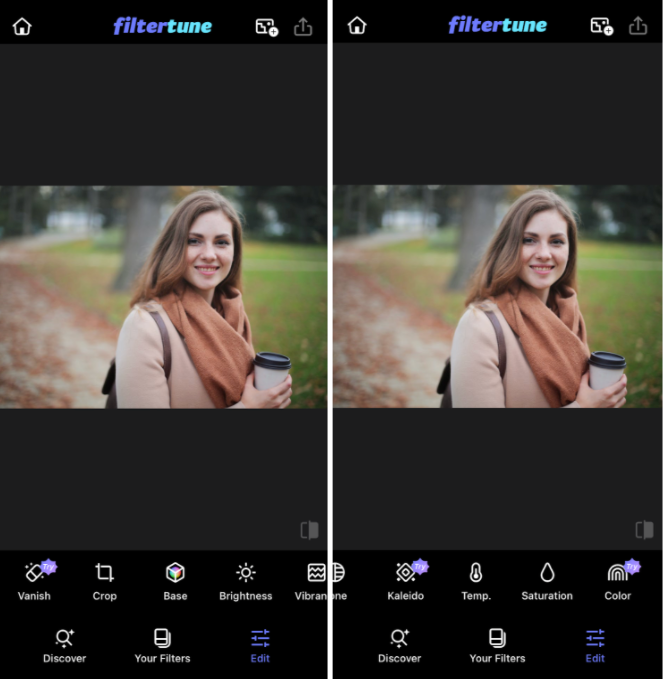
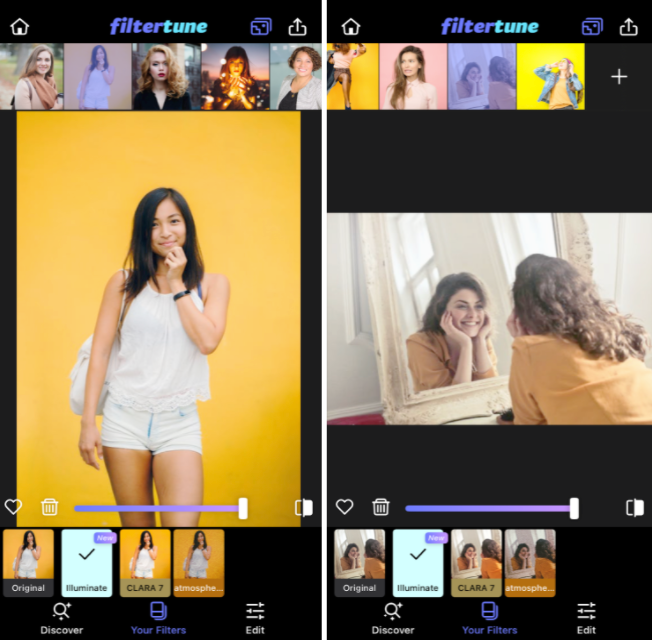
You can also press the button in the bottom right corner to flip the filter on and off, so you can easily compare it to the original. You can clearly see this filter, “Illuminate,” has brightened the shadows on the original image. If you’re a fan then you can press “Save Filter” to store it for later.
Once you’ve selected a filter, you can make further edits to your image. Alternatively, you can click original to start from the raw image and create a completely custom filter yourself. Just press the “Edit” button to get started.
You can see that Filtertune has a wide variety of effects that can be applied, including all the ones you might expect for color correction, such as Saturation, Temperature and Brightness. These give you fine control over exactly how your image will look to create the perfect distinct style.
There are also some more advanced effects to pay particular attention to because of how powerful they are.
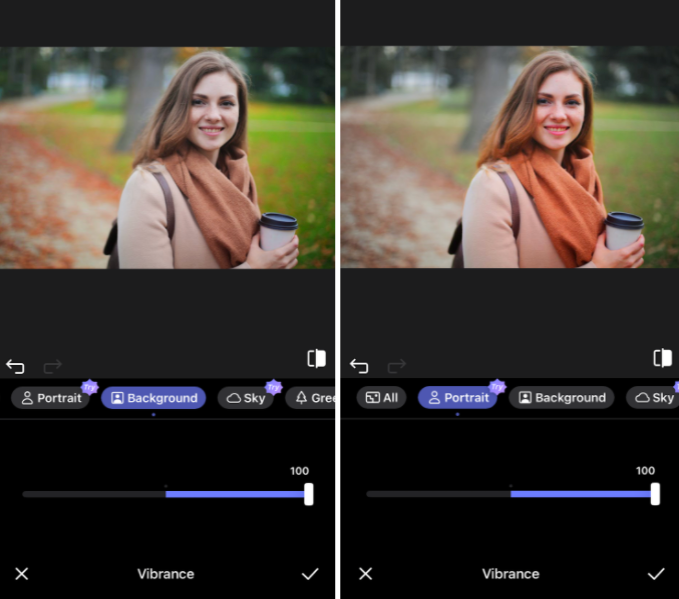
Let’s start with the Vibrance tool. After applying, you can see the image pops out of the screen far more energetically. Like several of the custom tools, you can apply the effect at different levels to different parts of the image. In the example below, on the left, the vibrance is only applied to the background to really bring out the autumnal feel. On the right, the vibrance is only applied to the lady, which makes her glow.
Bloom is another effect which can allow you to look more professional in your images. People often seek the blurred background effect and will use expensive DSLR cameras to achieve it. Yet you can do this within Filtertune with ease.
Below, on the left, the whole image has Bloom applied. You can see how the blurred background increases the attention of the subject of the picture.
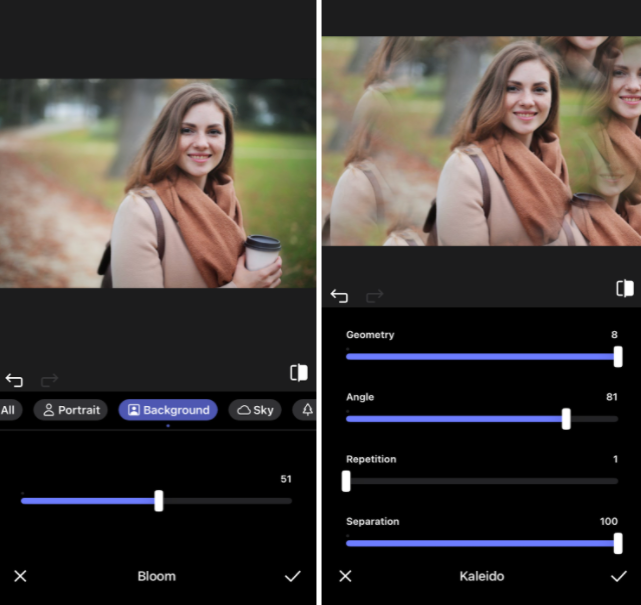
If you’re looking for something more abstract, you can try the Kaleido option. You can change the different settings until you find an effect that works for you.
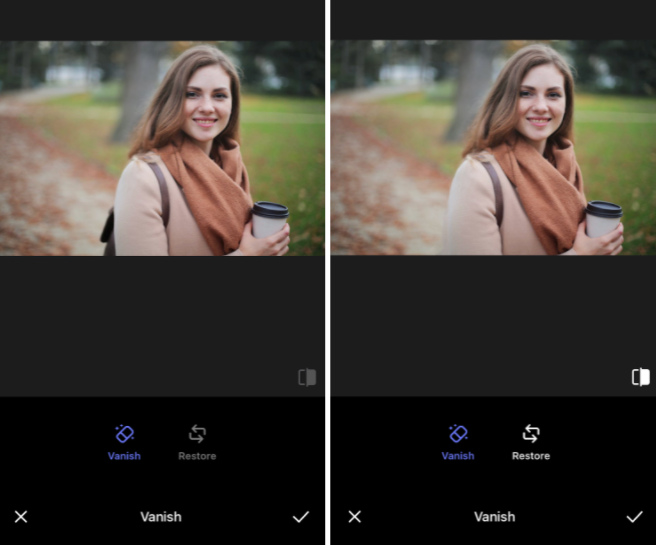
The vanish tool can be a life-saver if you want to keep consistency in your photos but have an unwanted element to your photo. You simply wave your finger over what you want to disappear, and it’s gone. Check out the two images below. Notice how the rucksack has seamlessly been removed.
Once you’ve found the perfect set of settings you love, it’s time to make sure the filter works for the different types of images you expect to be posting. This can be done easily by adding photos to your “Photo Drawer.”
You click on the gallery-style icon at the top (in purple) and add your other photos. Now you can swipe through the images and see how they appear. You can always flip to the original to see if you are happy with the improvement.
You can continue working on the same filter using a different image if you wish until you’re settled and can start downloading.
Now you have your perfect filter and saved and can reuse it for all of your future posts. As you post more using the filter, your audience will be able to recognize your photo style and identify you just from its characteristics. You can even apply filters to your video content too.
Happy creating.