WordPress Two-Factor Authentication: How To Set It Up
Why is having a strong password so important? Bad passwords are one of the most common ways to compromise your WordPress setup. For somebody who has a very common 8-character password, it can literally take less than a second for a computer to go through the possibilities to pull that password out. That’s why WordPress two-factor authentication can be so important.
So, if you’ve thought that having a simple 8-character password for your WordPress login is enough to protect your site from hackers, think again. Because around 30,000 websites gets hacked every day and there were around 16,000 (and probably more) WordPress sites hacked in 2016 alone.
Obviously, even having a long and strong password is no longer enough to protect you from hackers. Doing something as simple as clicking on a link in a malicious email or unknowingly downloading a malware infested software is enough to put you at risk.
This is why Two-Factor Authentication, or 2-Step Verification, was invented. Today we’re looking at how you can set it up simply for your WordPress website, regardless of what theme you’re using!
What Is WordPress Two-Factor Authentication
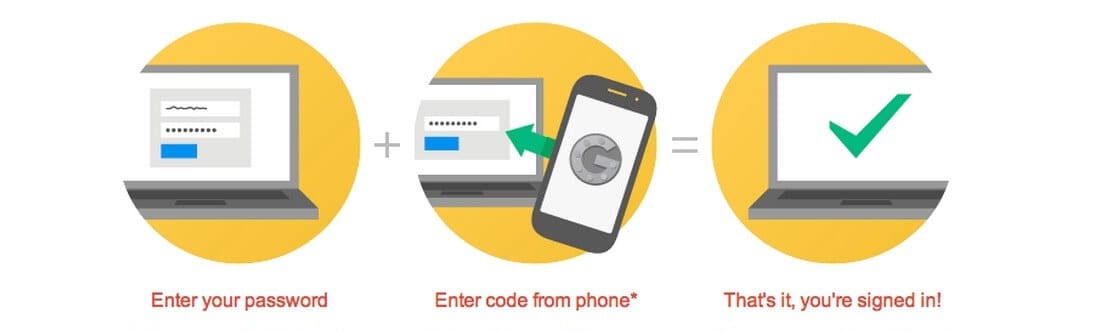
Two-factor authentication is a process that allows you to add an extra layer of security on top of your passwords. When activated, it will let you verify your identity in two steps: 1. Enter your password. 2. Enter a unique security code that you generate on your smartphone.
There are two ways of using 2-Step Verification: SMS-based verification and authenticator app based verification.
When using the SMS-based verification, you receive your unique code, or one-time password, via SMS. Although, this method is now considered to be no longer secure since hackers have found ways to hijack your SMSes.
At the moment, using an authenticator app, like Google Authenticator, is the best approach to adding two-factor authentication. When following this method, you’ll be using the Google Authenticator app to generate unique codes to enter when logging in to your accounts.
But, how do you add 2-step verification in WordPress?
Best Two-Factor Authentication Plugins
Almost all popular online services, like Google, Dropbox, Facebook, Microsoft, already supports two-step authentication. You can enable it via the settings page of your accounts.
Although, sadly, WordPress still doesn’t have this feature integrated into the system. As a result, you have to add it manually by installing a third-party WordPress plugin.
Here are some of the best plugins you can use to get that job done.
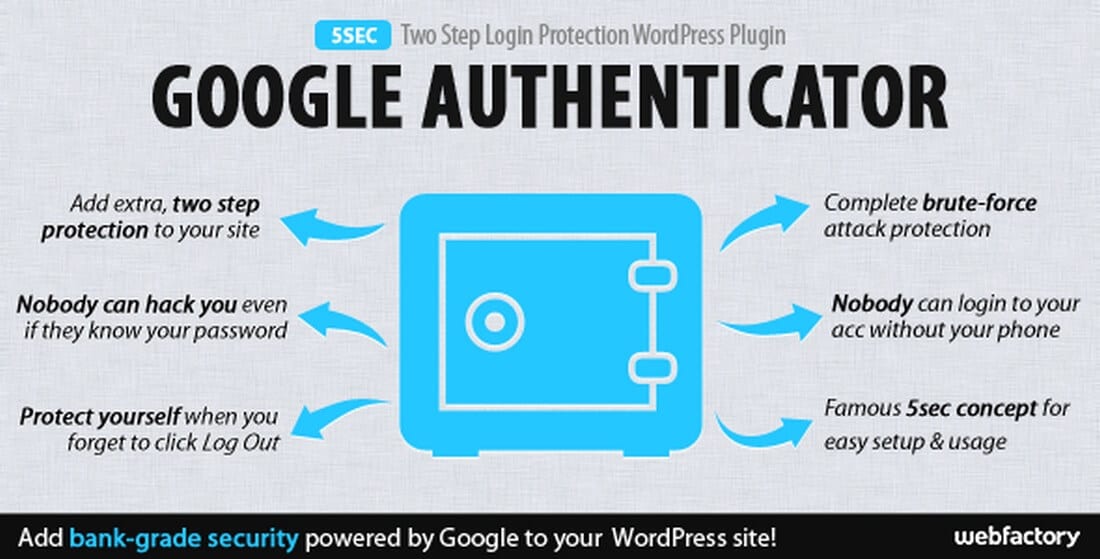
5sec Google Authenticator
- Price: $18
- Requires: WordPress 3.6 or higher
This plugin adds “bank-grade security” to your WordPress website by integrating Google Authenticator with your login system. Once installed, no one will be able to access your site without your phone.
The 5sec Google Authenticator plugin also provides complete brute-force attack protection for your website and even protects your account with an automatic log-out feature to protect your site whenever you forget to log out from your account.
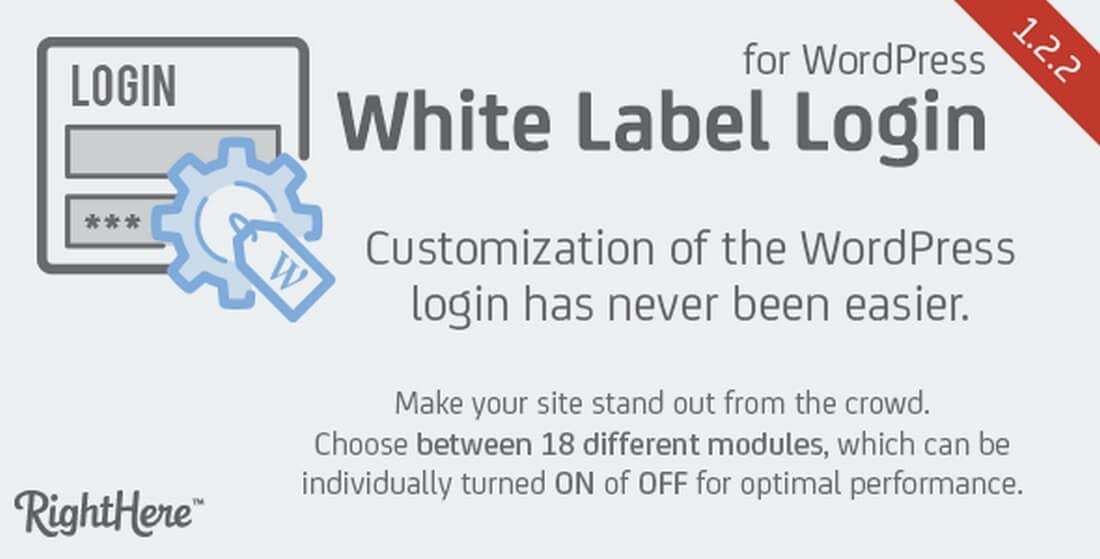
White Label Login for WordPress
- Price: $25
- Requires: WordPress 4.0 or higher
This plugin not only connects Google Authenticator app with your WordPress site, but it also allows you to completely customize your WordPress login page with a unique design.
It also includes a Maintenance Mode with a countdown timer, Google reCAPTCHA, social network login support, and much more.
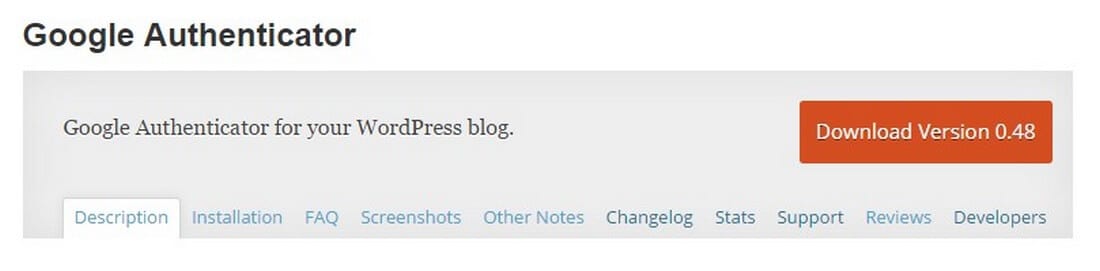
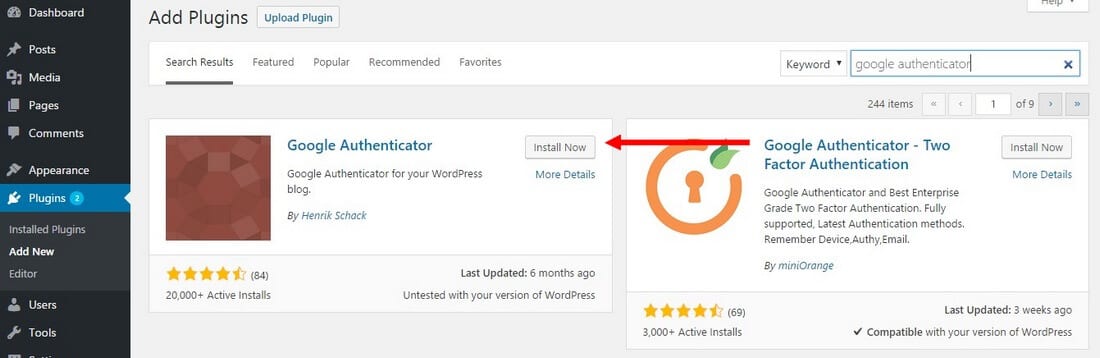
Google Authenticator
- Price: Free
- Requires: WordPress 4.5 or higher
This is the highest-rated and the best functioning WordPress two-factor authentication plugin you can find for free. It doesn’t include any sophisticated features as the premium plugins above, but it comes with the necessary basics for integrating Google Authenticator with your WordPress site.
Clef Two-Factor Authentication
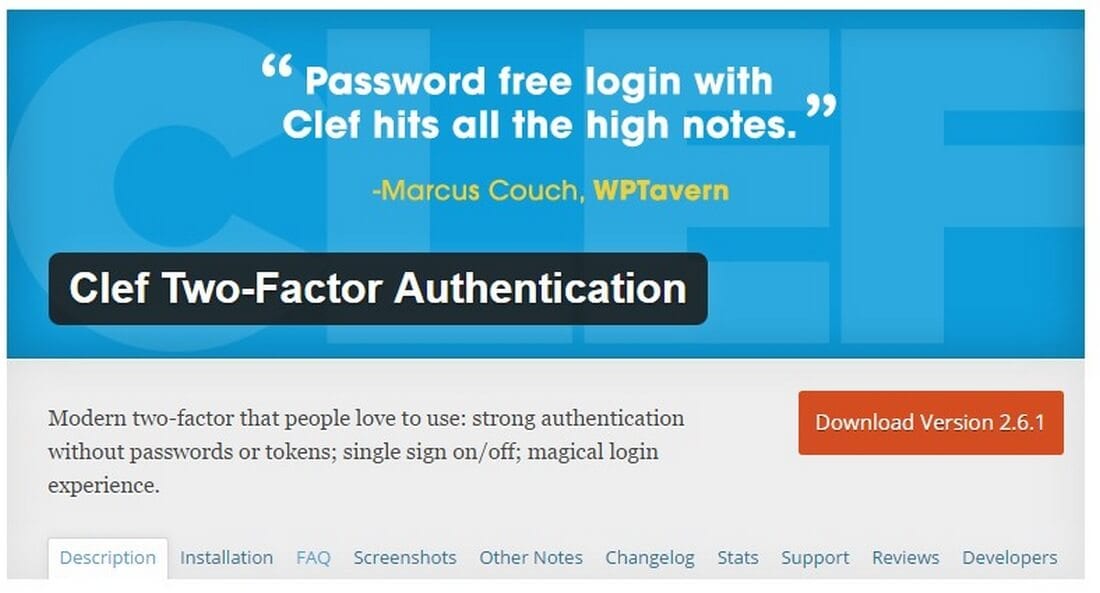
- Price: Free
- Requires: WordPress 3.6 or higher
Clef is yet another popular plugin for setting up WordPress two-factor authentication. The only downside is that it doesn’t integrate with Google Authenticator app. Instead, you have to install an app developed by the Clef inc. to generate the unique codes. If you don’t mind installing an app just to generate codes for your blog, this plugin is worth checking out.
How To Set It Up
For the purposes of this demonstration, we’re using the free Google Authenticator WordPress plugin, which is not an official plugin made by Google. It’s created by an independent developer named Henrik Schack.
We highly recommend that you use a paid plugin for maximum security since they are better coded, often updated, and developed by the experts. Installation process will be pretty much the same with a paid plugin.
Before installing the WordPress plugin, install the Google Authenticator app on your phone. It’s available on both Android and iOS platforms.
Now follow the instructions to setup two-factor authentication in your WordPress blog.
Step 1: Search for the Google Authenticator WordPress plugin. Then install it and click the “Activate” button to activate the plugin. If you’ve downloaded a premium plugin, you can use the “Upload Plugin” button to upload and install the plugin.
Step 2: Go to your WordPress user profile to customize the Google Authenticator plugin settings.
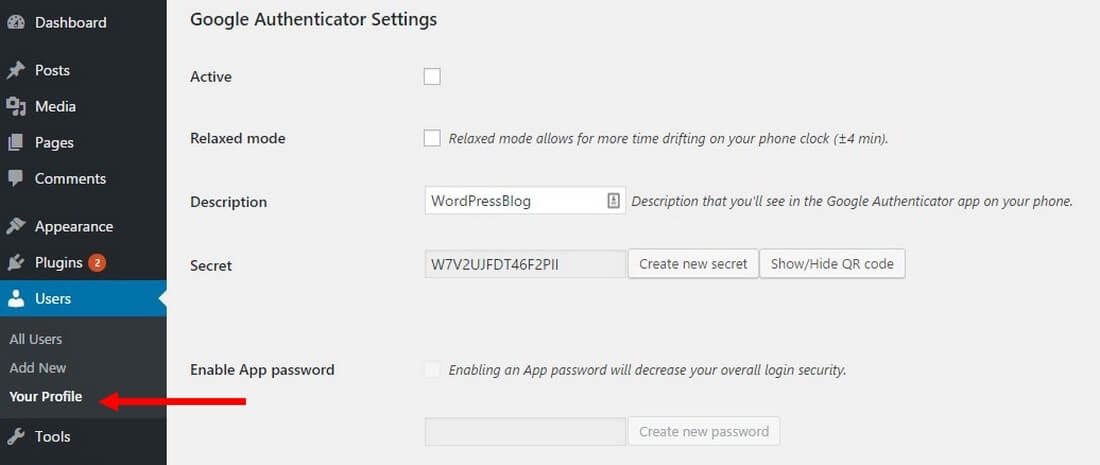
Step 3: Click on the “Active” checkmark to enable 2-step verification. Then enter a description to easily recognize your blog in the Google Authenticator app.
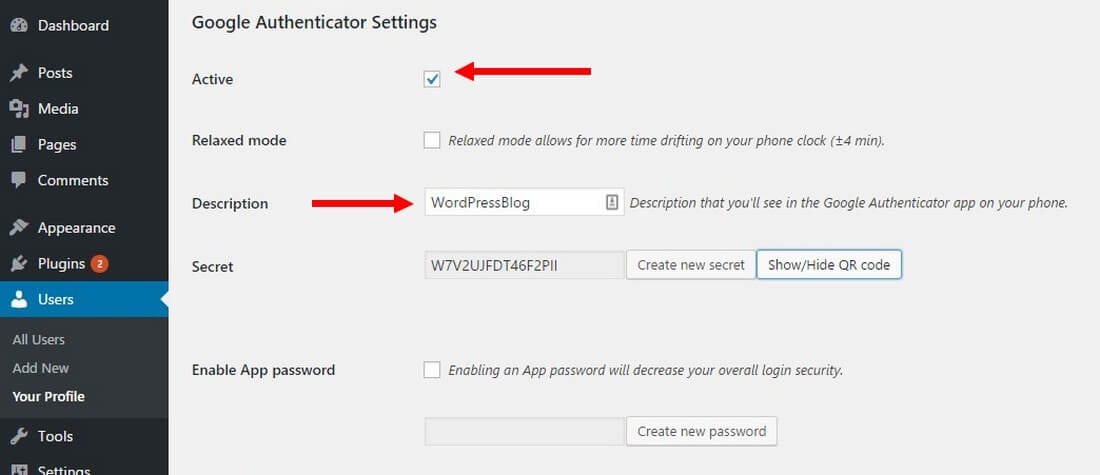
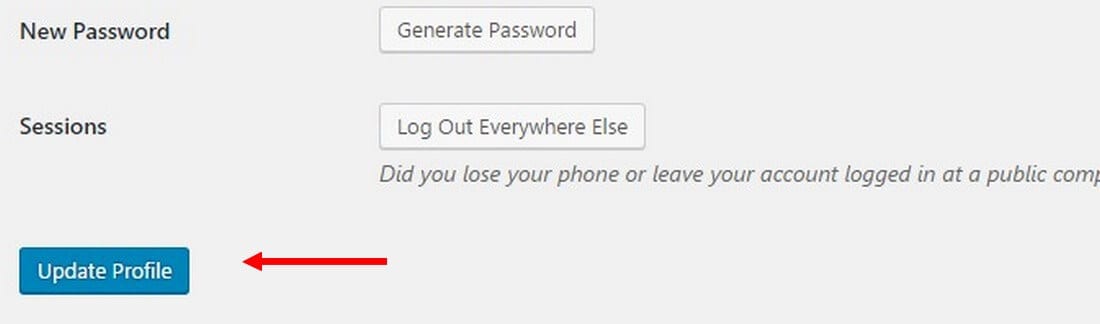
Step 4: Update your WordPress user profile to save the changes.
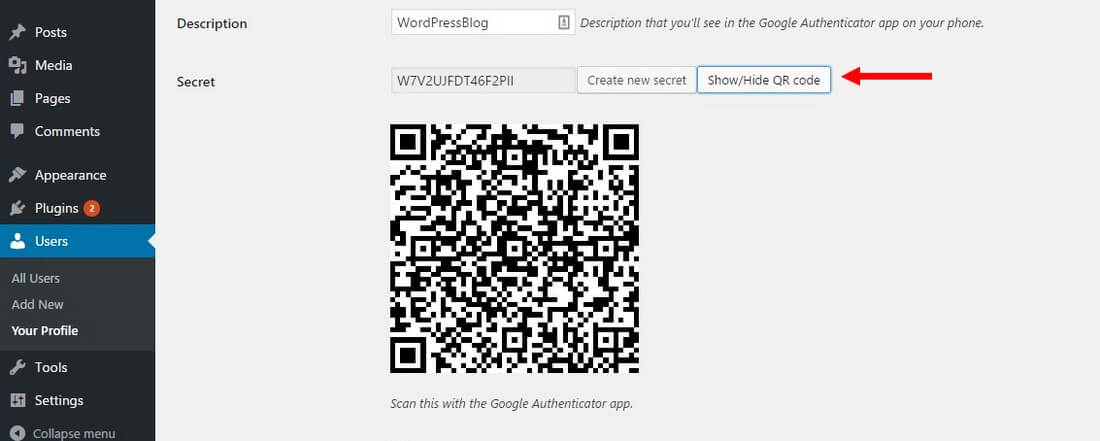
Step 5: Go back to Google Authenticator Settings and click on “Show QR Code” button to reveal the QR code for your blog. You can also manually enter the “secret code” into the app, but scanning the QR code is much easier.
Step 6: Now, open the Google Authenticator app on your phone. Tap on the big red plus (+) icon and select “Scan QR Code” to scan the QR code on your blog with your phone.
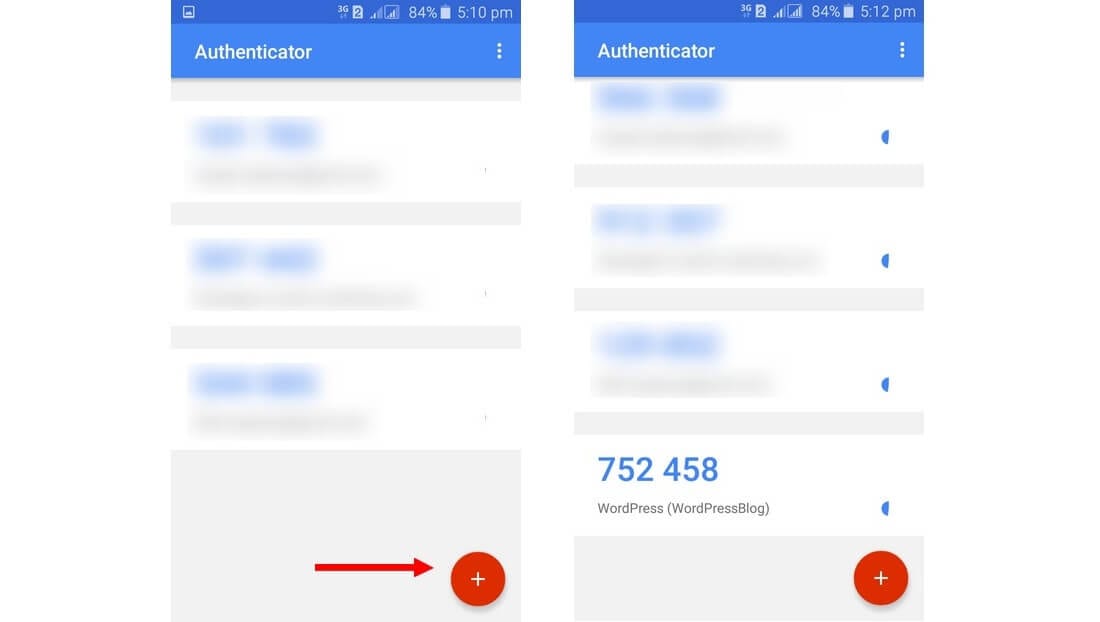
Step 7: After successfully scanning the QR code, your blog will be automatically added to your Google Authenticator.
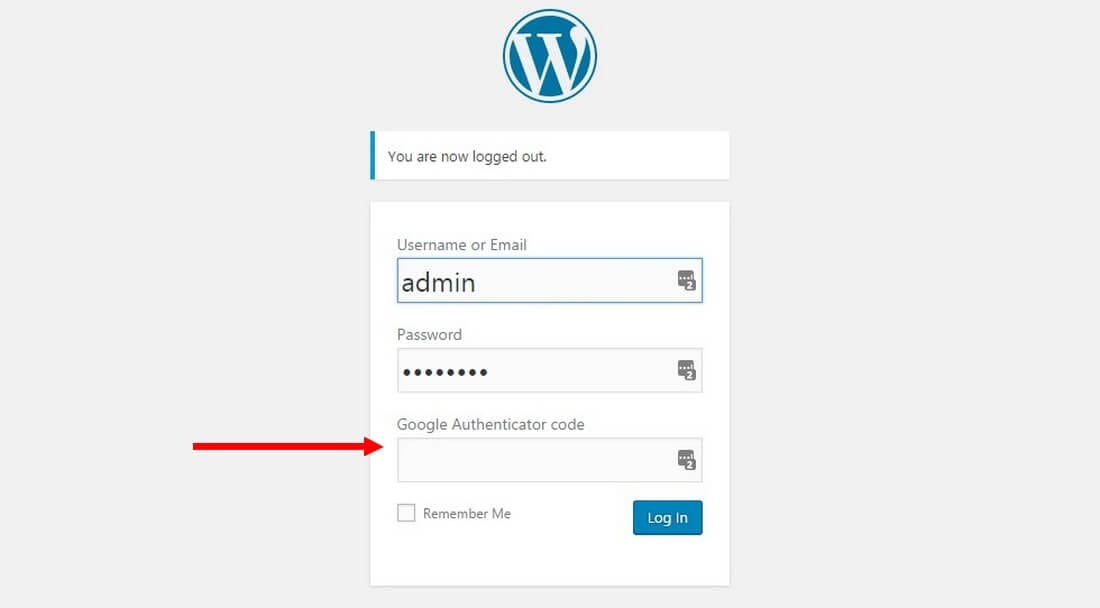
From now on, every time you login to your WordPress admin panel, it will require you to enter a unique code generated with your Google Authenticator app.
This feature can also be used by multiple users on a WordPress blog, but they will have to activate Google Authenticator individually. So, if you have other contributors on your blog, be sure to ask them to opt-in for better security.
If you would like to disable this function, just go back to your user profile and uncheck the “Active” button in the Google Authenticator section. Then you can uninstall the plugin to get rid of it permanently.
Keep in mind that these security plugins don’t allow you to generate backup codes for your accounts. So, if you lose or break your smartphone or accidentally remove the Google Authenticator app, it might make things difficult for you to get access to your WordPress dashboard. It’s not impossible, only difficult.
Still, it’s a risk worth taking to protect your site from hackers. Getting WordPress two-factor authentication set up quickly after you get your website live is a very useful step to take!