How To Integrate & Use MailChimp With WordPress
MailChimp is the best email marketing service you can use to grow your first email list. And in this guide, we’ll show you exactly how to use MailChimp with WordPress, step by step.
Ask any marketer and they’ll tell you to build an email list as soon as you have your website up and running. Not only because it’s the most effective online marketing strategy but also for its accessibility.
3.9 billion people use email every day and you can reach this massive audience for free to promote your business and sell products. Even if you just want to get more traffic to your blog, email marketing will help you build a solid audience around your website.
The best part is it won’t cost you anything. We’ll show you how it works.
What Is MailChimp?
If you’re not familiar with MailChimp, here’s a quick overview of the service.

MailChimp is an email marketing service. It gives you all the tools and options to collect emails of people who visit your website and send them a newsletter. Or promotional emails.
MailChimp has been around for many years serving millions of users around the globe. What makes it popular among WordPress users is how easy it is to integrate with the CMS. And, of course, its’ generous free plan.
Why Use MailChimp?
There are many different email marketing services out there. So why use MailChimp? To answer that question, here are a few benefits of using MailChimp.
- It’s FREE: MailChimp offers a free plan that lets you grow an email list of up to 2000 subscribers. This usually costs around $29 per month on other platforms.
- Free Automation: MailChimp’s free plan also includes automation. Using this you can send automated welcome emails to your subscribers.
- Ease Of Use: MailChimp has a very beginner-friendly user interface. You can learn to use it quite easily.
- Better Support: Thanks to its popularity, MailChimp is supported by all website building platforms and content management software.
Best MailChimp WordPress Plugins
You’ll need a good MailChimp WordPress plugin to integrate the software with your website. These plugins also allow you to setup email popups and optin forms, which allows you to collect emails from your website visitors.
There are a lot of great plugins you can use to get this job done. Here are just a few that’s worth checking out.
Ninja Popups
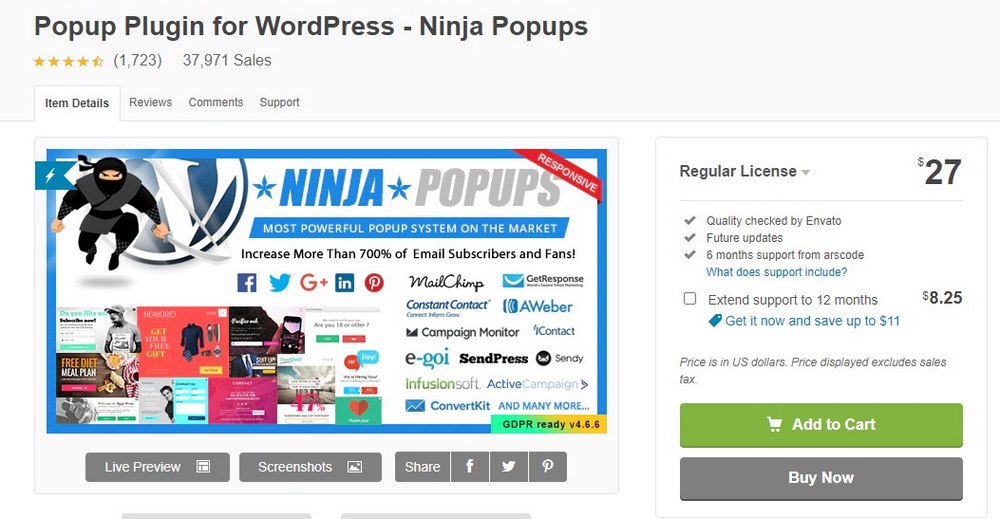
- Price: $27
With more than 37,000 customers, Ninja Popups is one of the most reliable WordPress plugins you can use to integrate with MailChimp. The plugin works with every email marketing service available today.
Ninja Popups also lets you choose from dozens of pre-made optin form designs. And it even supports exit intent technology and content lock features to help boost the conversion rates.
MailOptin
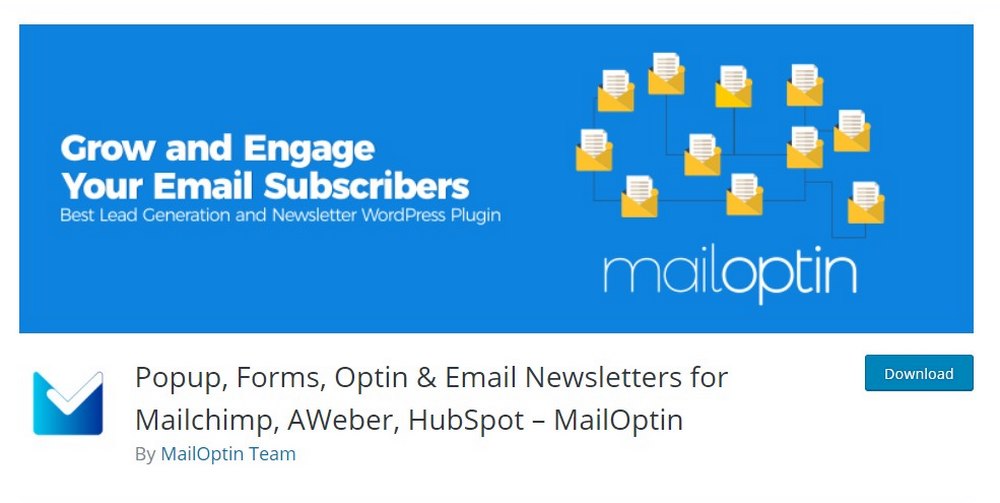
- Price: Free
MailOptin is the best MailChimp WordPress plugin you can get for free. It’s very lightweight and easy to use. The free version gives you plenty of options to create a custom popup form and you can use it even without MailChimp as well.
The premium version of the plugin includes more features and costs $69 per year. We covered more details about this plugin in our review.
MailMunch
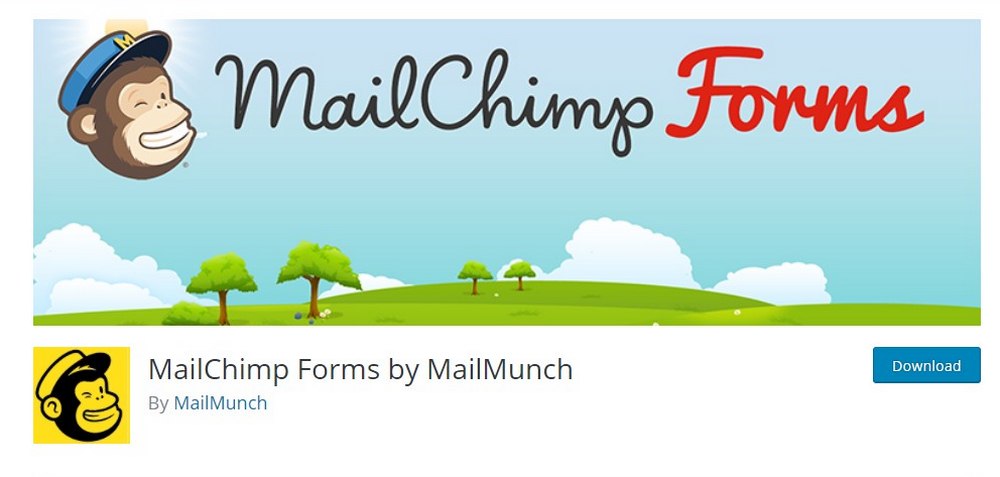
- Price: Free
MailMunch is another free plugin you can use to integrate MailChimp with WordPress. It also includes a beginner-friendly editor where you can build a custom popup form to match your branding.
MailMunch free plan lets you add unlimited popups and optin forms on your website. The premium version lets you setup landing pages and pricing starts at $6.99 per month.
Green Popups
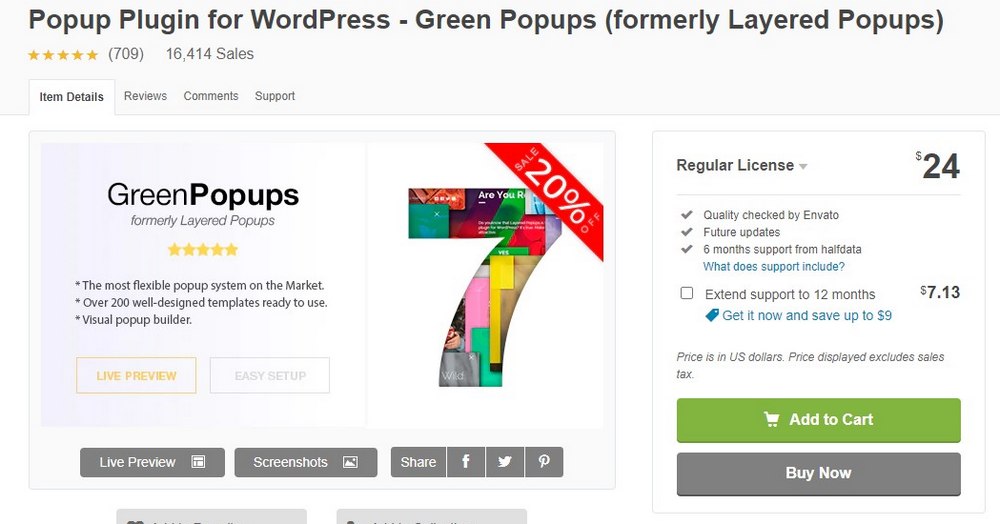
- Price: $24
Green Popups is a premium MailChimp plugin for WordPress. It lets you choose from more than 200 premade popup templates to design an email optin form for your website.
In addition, the plugin also includes exit-intent technology, Adblock detection, sidebar widgets, and much more for growing your email list using different methods.
Elementor Pro

- Price: $49 per year
Elementor is a page builder plugin for WordPress. Using this plugin, you can build landing pages and custom homepages. The plugin now includes a popup builder where you can design custom email popup forms with ease.
The popup builder is included in the premium version of the Elementor plugin. When you buy it you get access to the popup builder and all the premium features of the page builder. It’s a two-in-one deal that’s well worth its price.
How To Integrate MailChimp with WordPress
Now that you understand the basics of MailChimp and WordPress, let’s see how to integrate the two platforms to start growing your email list.
Step 1: Setup a MailChimp Account
First, head over to MailChimp website and signup for a free account. It’s recommended that you use a custom email address (eg: [email protected]) to register the account.
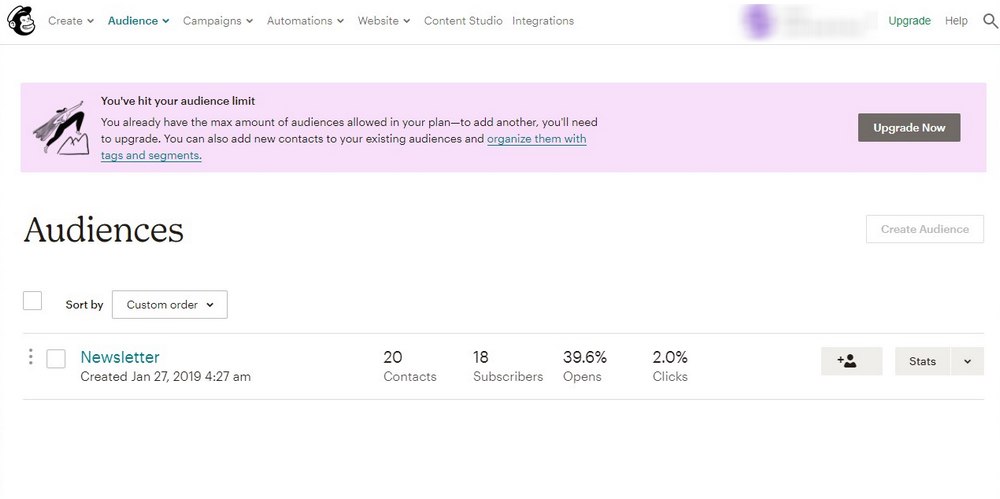
After signing up, go to the Audiences tab from your MailChimp dashboard. And create a new Audience, or in other words your first email list. The free account lets you create one email list but it’s more than enough to get started.
We’ll leave it up to you to learn how Audiences work and how to create email campaigns. You can use this guide to learn more.
Step 2: Install MailOptin Plugin
The next step is to install a plugin to connect MailChimp with your WordPress website. For the demonstration, we’re using the MailOptin plugin. It’s free and easy to use. But you can use any other plugin you like to integrate MailChimp. The process will be similar.
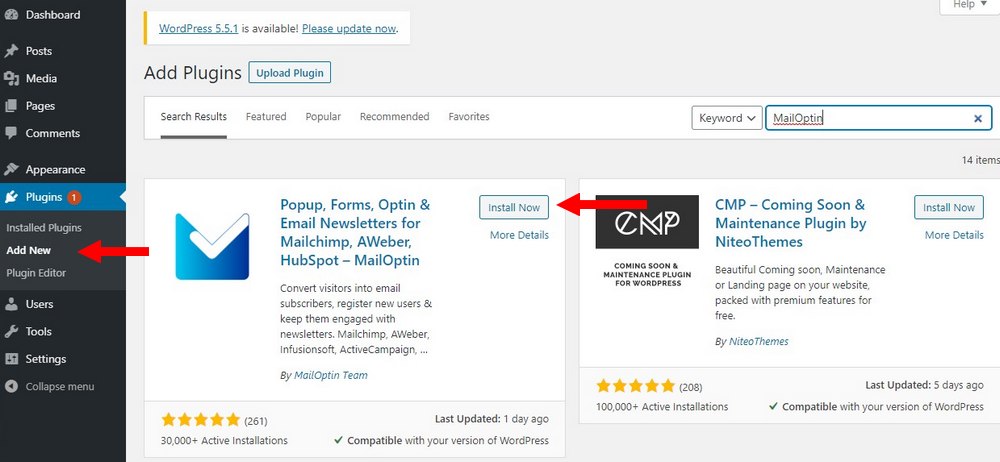
From your WordPress dashboard, go to Plugins >> Add New. Search for the MailOptin plugin. Install and Activate the plugin.
Step 3: Connect MailChimp with WordPress
Now, let’s integrate MailChimp with WordPress using the MailOptin plugin.
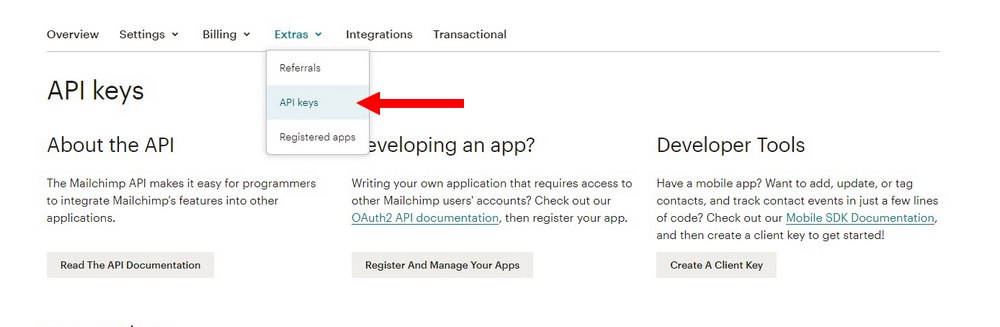
First, go back to your MailChimp dashboard. Click on your account name on top of the website and then on the Account link in the drop-down menu.
Then, from the Extras menu, select API Keys.
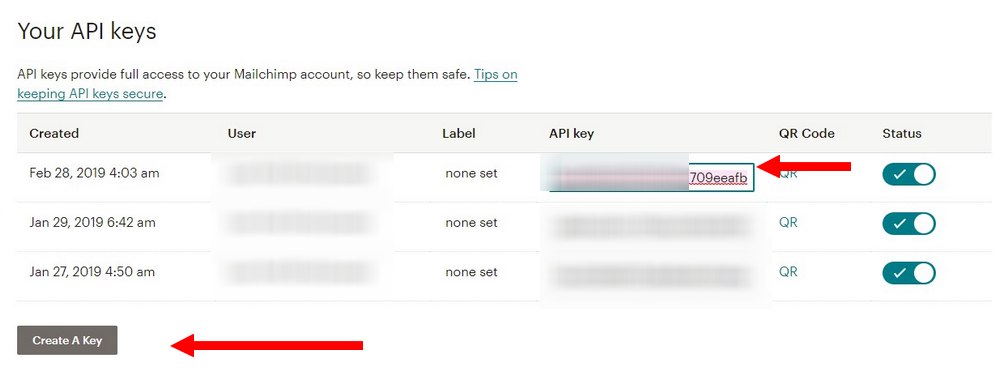
Create an API Key and copy the code.
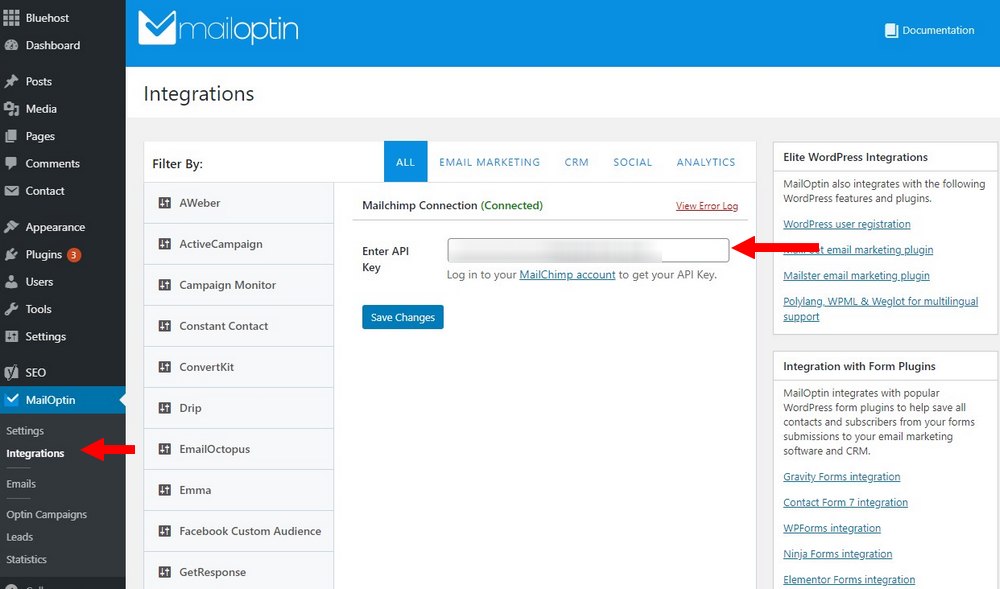
Head over back to the WordPress dashboard. Go to MailOptin >> Integrations tab. Find and select MailChimp from the available options. And then paste the API Key that you copied from MailChimp.
Save the changes. Your website is now connected with MailChimp.
Step 4: Design a Popup Form
It’s time to design an email optin form to start collecting emails from your website visitors.
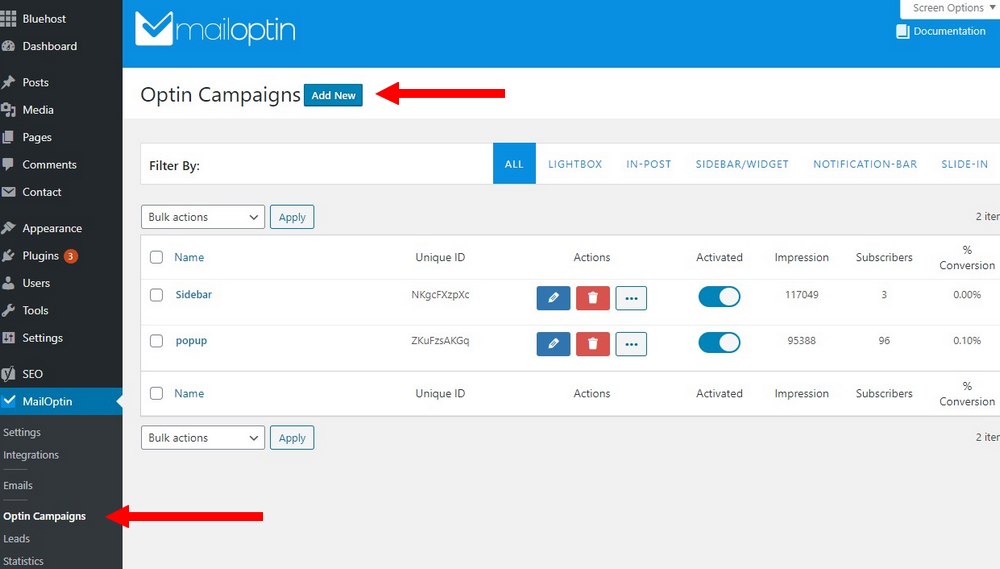
Go to the Optin Campaigns tab on the MailOptin tab and select Add New.
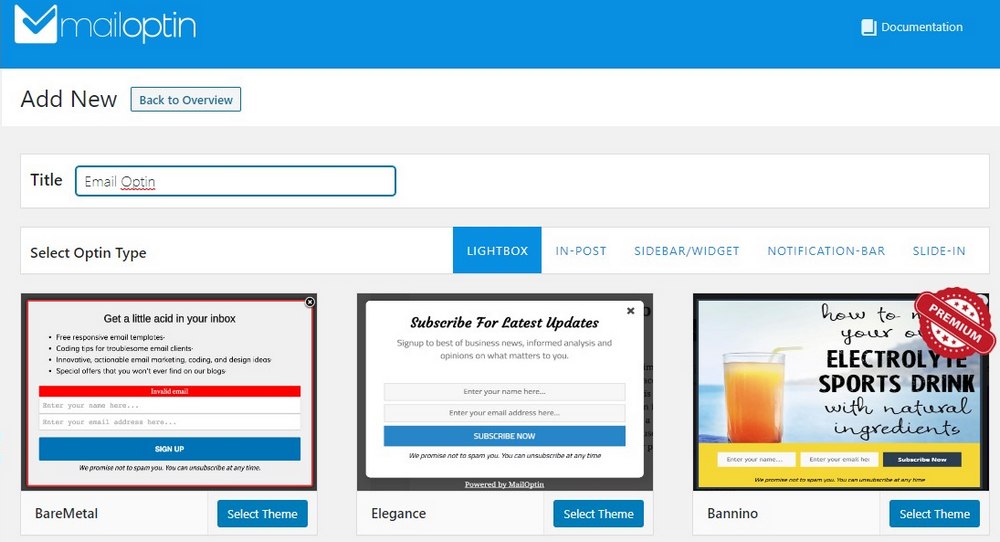
Give your campaign a name and select a template to get started.
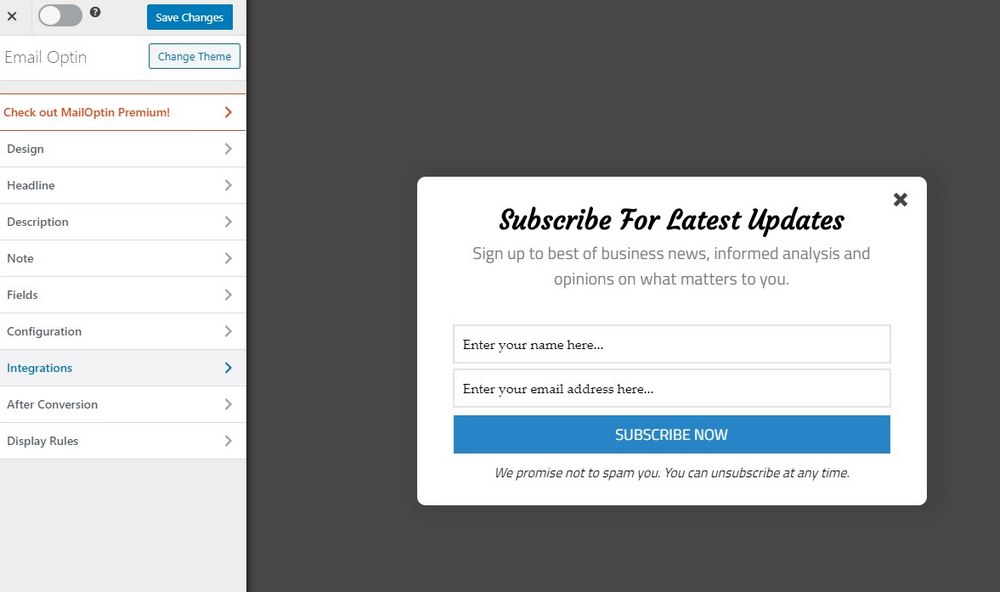
You can customize the design of the popup form however you like. The optin form editor works the same way as the WordPress theme customizer works. So it’s easy to learn.
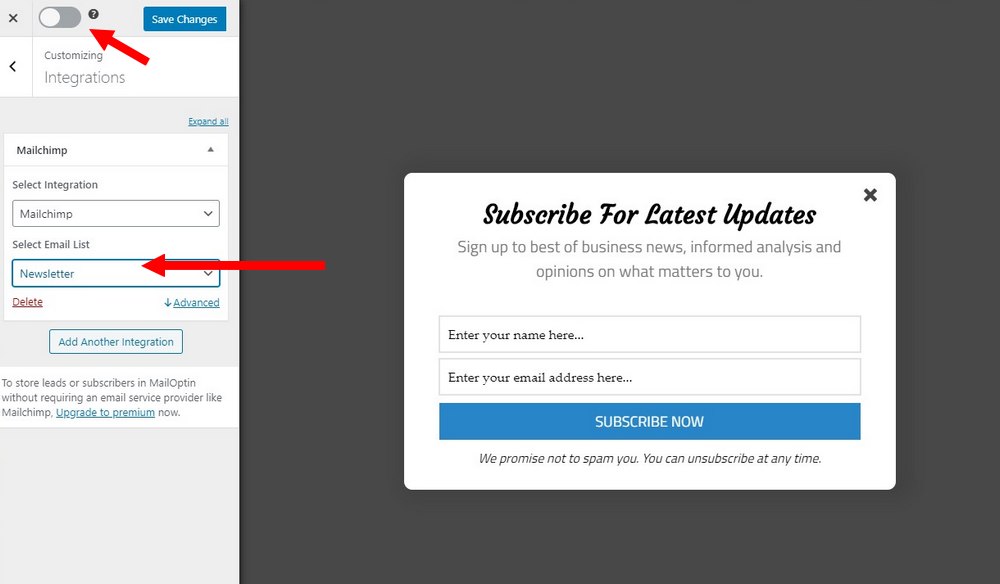
The important part is connecting MailChimp with this popup form. To do this, go to the Integrations tab on the editor. Then select MailChimp as the integration and choose your Audience.
Once you’re done, save the changes and toggle the button on top to activate the campaign.
Now whenever someone visits your website they will see a popup with the email optin form. And when they enter their email using this optin form, the email will be automatically added to your email list in MailChimp. It’s that simple.
Conclusion
In addition to using popup forms, there are many other ways you can grow your email list. You can offer incentives like free downloads. Create lead capture pages to improve conversions. Hold giveaway contests. And much more.
More importantly, you should have a professional-looking theme design for your website. It’s the key to building trust and reputation. Check out our exclusive themes collection for inspiration.
Looking for WordPress hosting? We use Kinsta. They offer world-class WordPress hosting, built to keep your website fast, secure, and always online.