How to Change the Font in WordPress
Fonts are everywhere. Whether you go outside and see a billboard or go online to read an article, fonts play a key role in most content we consume every day.
How much thought did you put into choosing a font for your website? Or are you still using the default font that came with your WordPress theme? It’s time you change that for the better.
In this guide, we explain the importance of fonts, how they affect your website and brand, and teach you how to change the font in WordPress with just a few clicks. Let’s dive in.
Why Change the Font in WordPress?
Have you ever felt tired or bored while reading an article online? Or are you keep getting terrible comments criticizing your blog posts? Well, believe it or not, it may have something to do with your website’s font.
According to font psychology, different types of fonts have a strong effect on the human subconscious and even affects how people perceive content. When we see written content, whether online or print, we use the font design to subconsciously evaluate the brand authority and the validity of the content. This happens without our knowledge.
For example, serif fonts are associated with elegance and as a result, they are used by most luxury brands and high-end businesses. Whenever we see a website using a serif font, our subconscious perceives it as trustworthy and authoritative.
Needless to say, the default fonts used by most WordPress websites and themes aren’t optimized based on font psychology and they certainly don’t fit every brand. This is why it’s important to change your website’s default font to something more appropriate for your brand and audience.
5 Tips for Choosing Great Website Fonts
As you can see, fonts have a much deeper meaning than you can imagine. So you should never choose fonts that just “looks good”. Pay attention to these factors when you’re looking for a font.
1. Check Readability
When choosing a font, the first and most important part to check for is its readability. How easy it is on the eyes. Making sure the font has enough spacing to ensure long paragraphs don’t turn into blocks of text.
Sans-serif fonts are generally the best choice for online magazines, blogs, and almost every type of website. Sans fonts are proven to improve readability.
2. Pick a Font Family
Most websites, especially blogs and magazines, use different sizes of headings and formatting. For example, this article contains both H2 and H3 headings to ensure you can easily scan content and read more comfortably.
Font families come with multiple font weights ranging from light to bold as well as in different styles and sizes. This allows you to use different weights for headings to make them more distinctive.
3. Consider Your Brand
Even though sans-serif fonts improve readability, sometimes it’s better to use a serif font. For example, if you have a website for a luxury brand or promoting a high-end product, serif font will help persuade your audience more easily and establish trust and authority.
Consider your brand and business when choosing a font.
4. Use No More Than Two Fonts
Pick one font for titles and headings and another font for body text. Don’t use more than two fonts. It can confuse your audience and even make your brand appear unprofessional.
5. Avoid Script, Cursive, and Decorative Fonts
In general, it’s best to avoid script and decorative fonts when making websites. Script fonts often look great on print designs, but they don’t work well online. Script fonts are not only hard to read but also takes a lot of space.
How to Find the Best Fonts for Websites
If you’re struggling to find a great font for your website even after following our tips, here’s a trick you can use to steal fonts from other websites.
This trick involves using a Chrome extension called WhatFont. Once installed, this extension allows you to check websites and see which fonts they are using.

With this tool, you can visit reputable and popular magazines and blogs to steal their fonts. Usually, most of the websites use fonts from Google Fonts. You’ll be able to easily find the same fonts and use them on your website for free.
Where to Find Fonts?
There are a few places you can look for better fonts.
Google Fonts
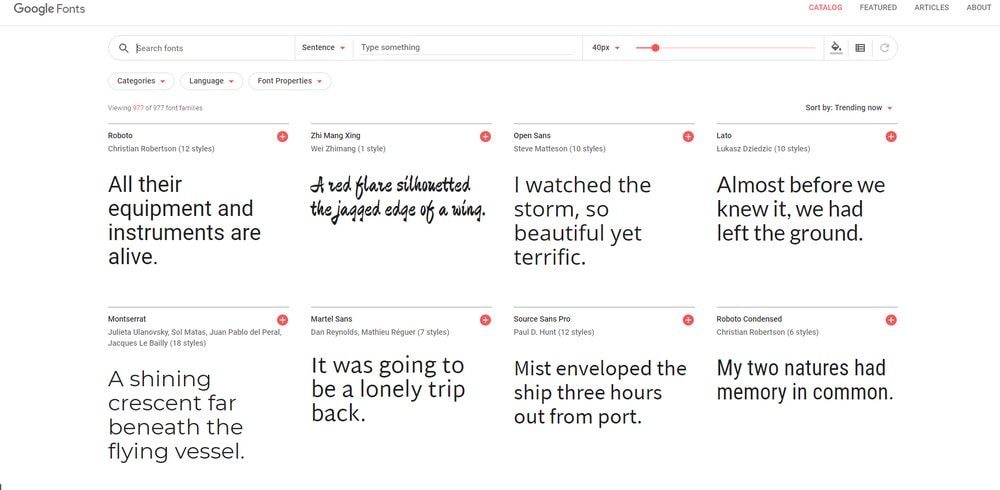
Google Fonts is the go-to choice for website fonts. It lets you access to over 600 fonts for free and use them with your website without having to worry about licensing or paying any fees. Installing fonts from Google Fonts is also fairly easy.
Adobe Fonts (Typekit)
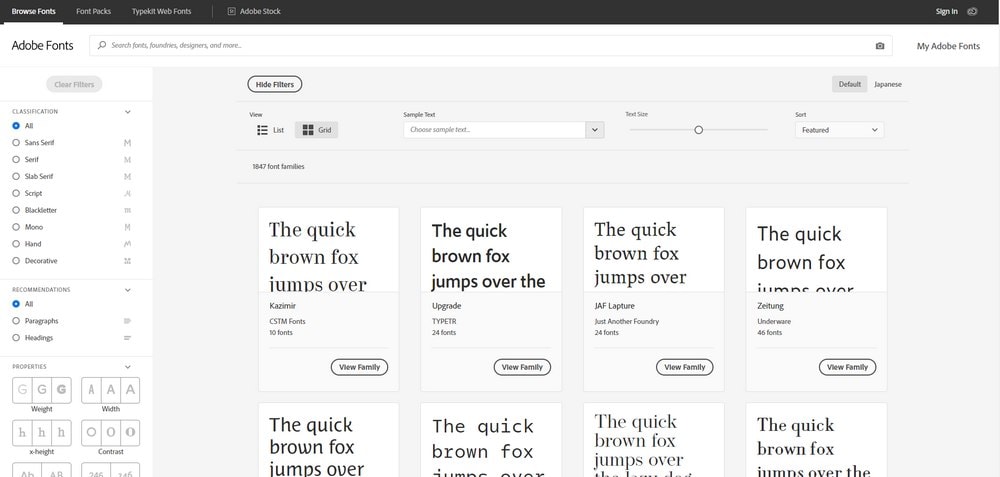
Adobe Fonts, previously known as Typekit, is also a great source for web fonts. You can use the Simplified Fonts Manager plugin to easily install Adobe Fonts on WordPress websites.
Envato Elements
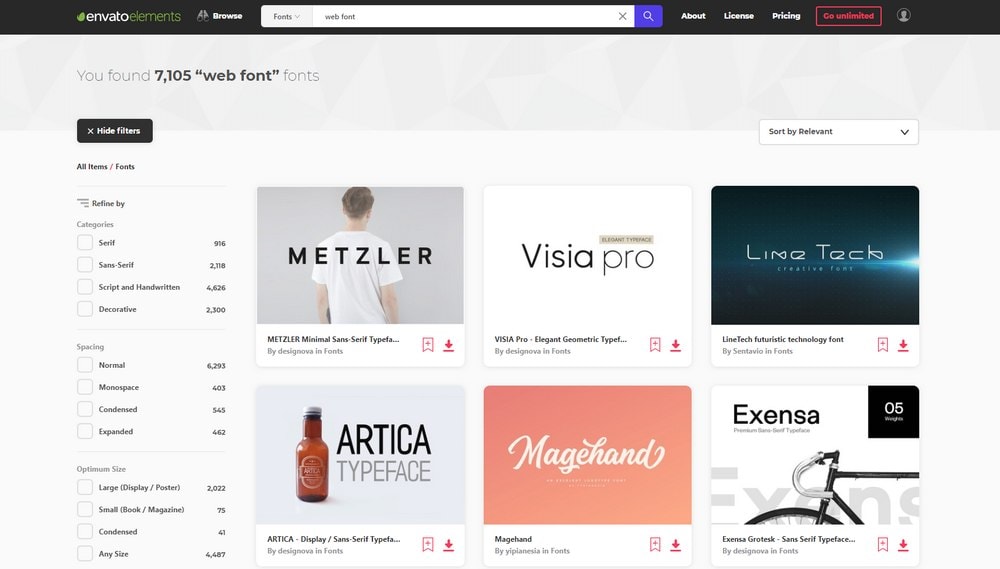
Envato Elements is a marketplace full of graphics elements. It also includes a large collection of premium fonts. If you want to make your website look more professional and stand out, you can use a web font from its collection.
3 Ways to Change Fonts in WordPress
There are a few different ways you can change fonts in WordPress. Let’s start with the easiest method.
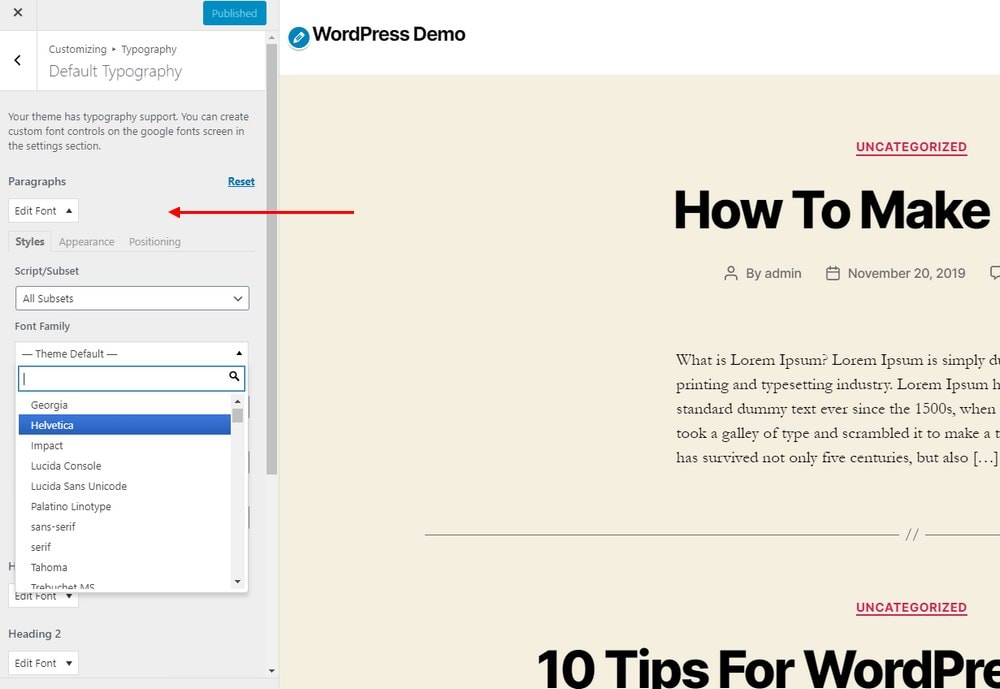
Method 1: Use WordPress Customizer
Most modern WordPress themes allow you to customize the theme design using the default WordPress customizer. This makes it easier to edit the design and see changes appear in real-time. You can also change the fonts using the Customizer too.
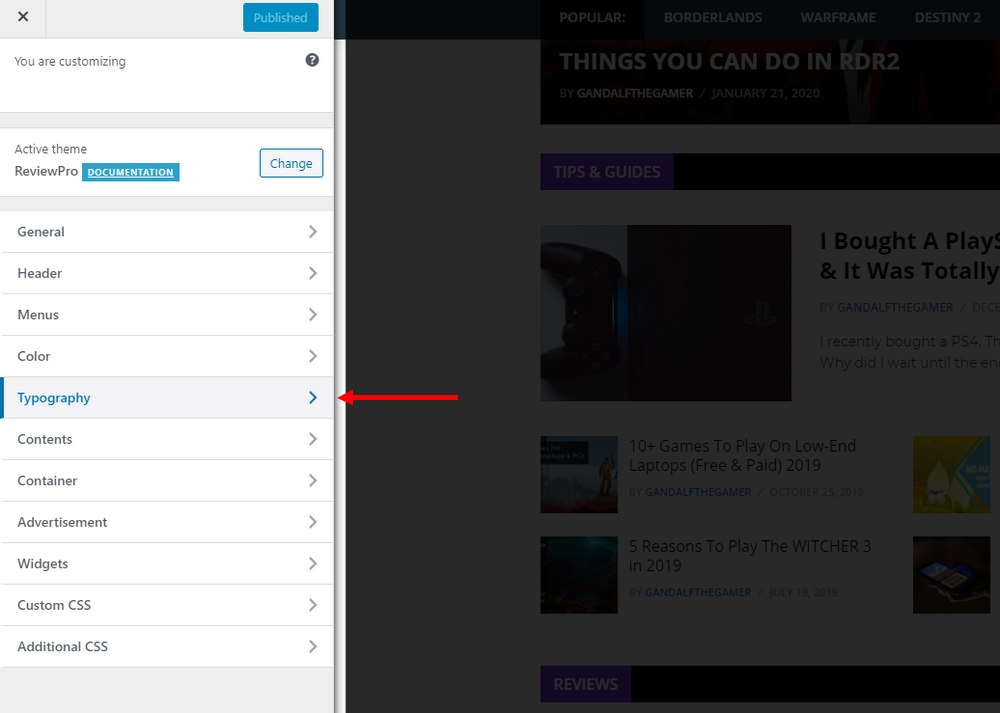
- Go to Appearance >> Customize
- Look for Typography tab
- Choose a new font from the available list
Note: This option is not available with all themes.
Method 2: Use a Plugin
Most themes don’t support WordPress Customizer for changing fonts. In such cases, you can use a third-party plugin to easily change fonts.
You can use Easy Google Fonts plugin if you want to use a font from a Google Fonts library. This plugin adds a Typography tab to your WordPress customer with access to the entire Google Fonts library.
- Go to Plugins >> Add New
- Search for Easy Google Fonts plugin
- Install and Activate the plugin
- Now go to Appearance >> Customize and change the font using the Typography tab
Method 3: Use Theme Editor
This is an advanced method that involves editing your theme files. If you have experience in HTML and CSS, we recommend using this method to change fonts. Otherwise, it’s best to seek help from an expert.
Either way, make sure that you backup your website and have a backup copy of your theme before editing any of its files.
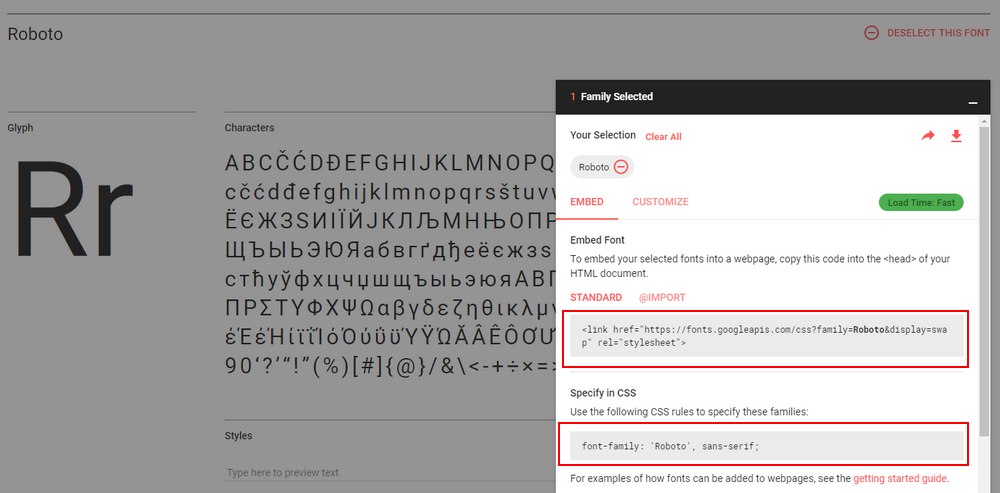
Step 1: Copy the code from Google Fonts
First, choose the font you want to install from Google Fonts and copy its HTML code and CSS code.
Step 2: Edit the Header.php
From the WordPress dashboard, go to Appearance >> Theme Editor. Then look for Header.php file.
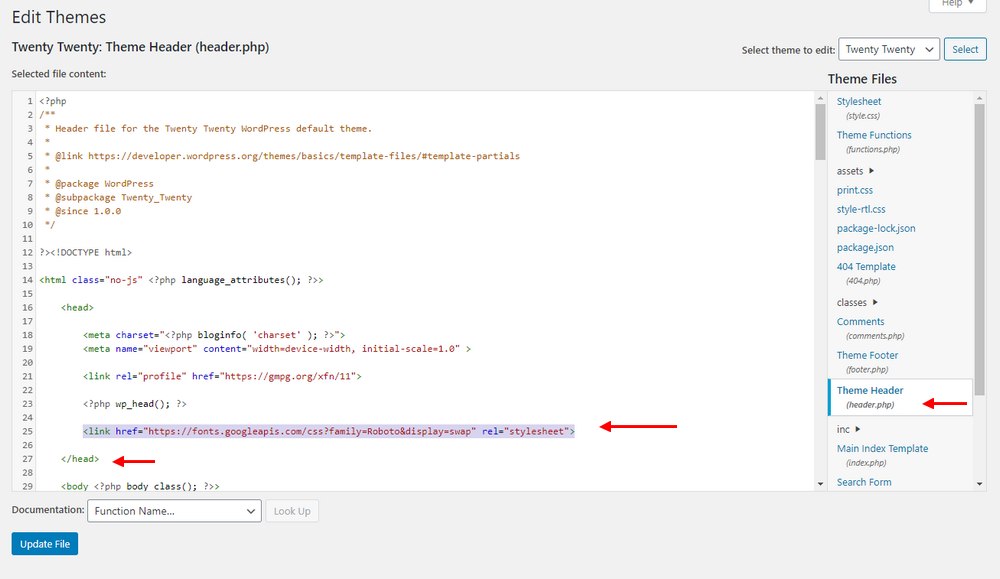
Now paste the copied HTML embed code from Google Fonts into the Header.php file. Make sure it goes after <head> tag and before the closing </head> tag.
Step 3: Specify in CSS
Now you need to add the new font in CSS to make sure your theme recognizes it as the new default font.
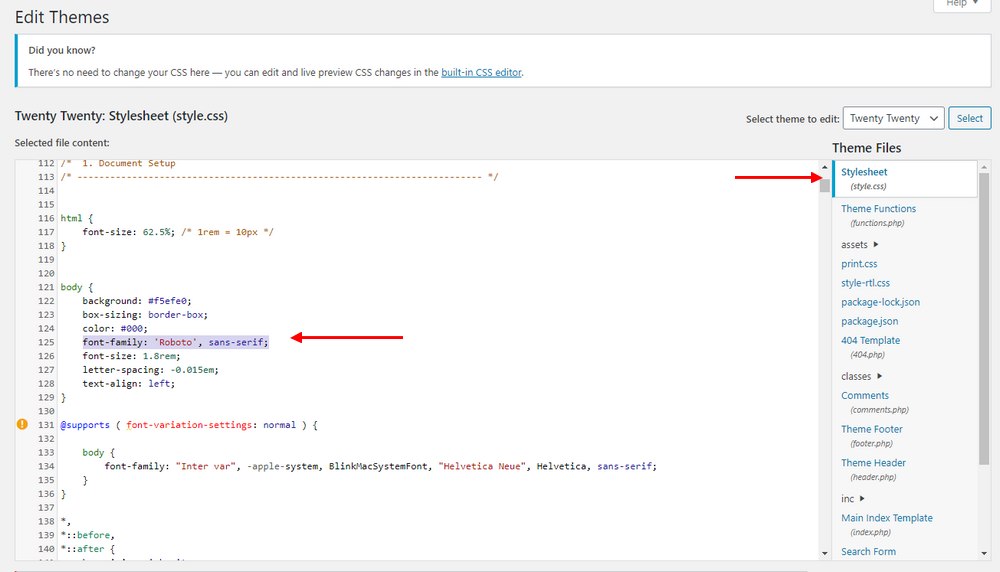
To do this, find the Stylesheet or the Style.css file in the Theme Editor. Then paste the CSS code from Google Fonts to where it says Font Family. Make sure to paste this code throughout the stylesheet.
For more details and advanced methods, check out our guide on using custom fonts in WordPress.
Conclusion
Another way to make sure that you can easily change the font in WordPress is to get a theme that supports Google Fonts or comes with a set of unique fonts. This will make things much easier for you to find and change fonts without a hassle.
For starters, check out our own themes bundle to get over 60 premium themes for the price of one.