3 Ways to Use Custom Fonts in WordPress
Tired of using the same old fonts used by thousands of other websites? Well, you’re in luck. In this post, we’ll show you how to customize your WordPress website to install more beautiful custom fonts in a few simple steps.
Typography plays an important role in website design. Having a smooth and an attractive font can make a big difference in improving your website’s user experience. Especially if your website includes a blog, using the right font can greatly improve readability, reduce bounce rates, and increase conversions.
Unfortunately, when it comes to choosing the right font, most WordPress themes don’t offer you many options. But, you don’t have to let that hold you back. There are several simple ways you can add custom fonts in WordPress. Keep reading to find out what they are.
Why Should You Use Custom Fonts?
If you’re using a professionally designed premium WordPress theme on your website, changing your default font is not a difficult task. You can do it from the theme customization page in a few simple clicks.
However, not all themes support this function. Many premium themes only offer a limited selection of fonts for you to choose from. This often means you get stuck with the same fonts that every other website uses.
If you want to use a font that helps your brand and business stand out from the crowd and offer great user experience to your visitors, you’ll need to switch to a better font. Installing a custom font is the only way to achieve that.

This is why most brands create their own unique fonts to create more memorable products and branded experiences to users.
Of course, you don’t have to create your own font for your website or blog. There are many places you can find original and professionally crafted fonts. And most of them are free to use.
How & Where To Find Custom Fonts?
Installing a custom font on your WordPress website is not as simple as installing fonts on your computer. This requires a little bit of work. But first, you need to find a great font with a great design and a font that’s also legal to use.
Just because a font is available to download, doesn’t mean it’s free to use. You need to find a font that allows you to use in personal or commercial projects. Here are a few sites where you can find a great font for free or for a few bucks.
- Google Fonts (Free)
- Font Squirrel (Free & Premium)
- Adobe Edge Web Fonts (Free)
- Adobe Typekit (Free & Premium)
- Creative Market (Premium)
- GraphicRiver (Premium)
How are you going to find the ideal font for your website and audience?
That’s easy. You can do that using online tools such as Font Pair, which helps you find the best pairing of fonts for your titles and body text by comparing Google Fonts.
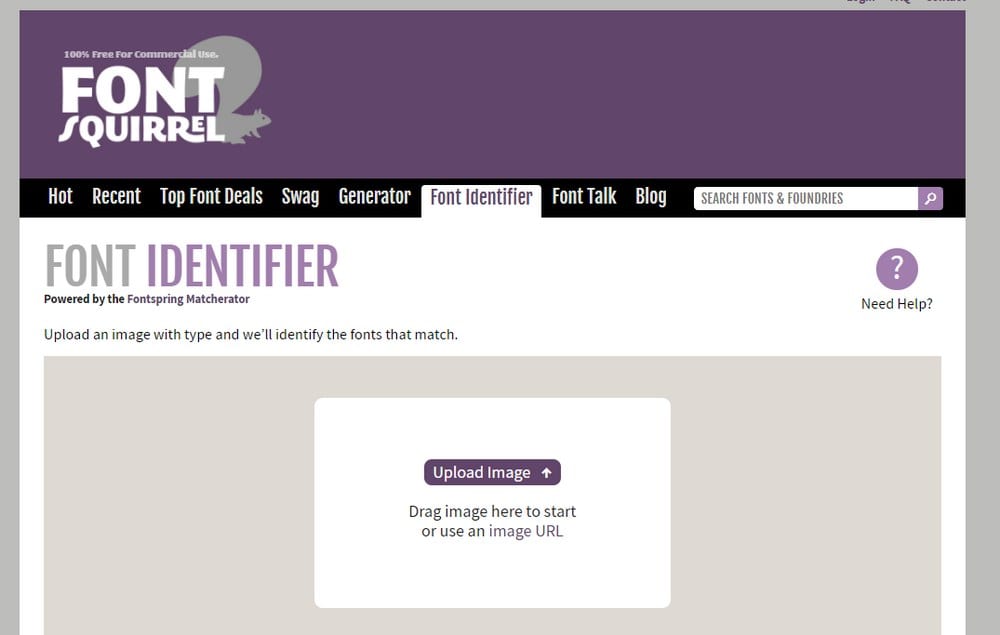
Or you can use Font Squirrel Font Identifier to find a font that looks similar to a font you’ve seen online or in a print magazine. All you have to do is upload a picture of the font and the tool will find the font for you.
You can also use the WhatFont browser extension to find the name of the font used by any website on the Internet.
Using these tools, you can identify the fonts used by professionals and successful websites to search for them on font marketplaces.
How To Add Custom Fonts In WordPress
Now that you’ve found a better and more beautiful font for your website, let’s figure out how to install this font on your WordPress website. There are three different methods you can follow.
Note: Some of these steps involve editing your website’s core files. Before you make any changes, make sure to backup your website and theme files.
1. Use A Plugin
If you don’t have any web design experience or want to avoid editing website theme files by yourself, then using a plugin to change the font is the best way to install a custom font on your WordPress website.
Easy Google Fonts
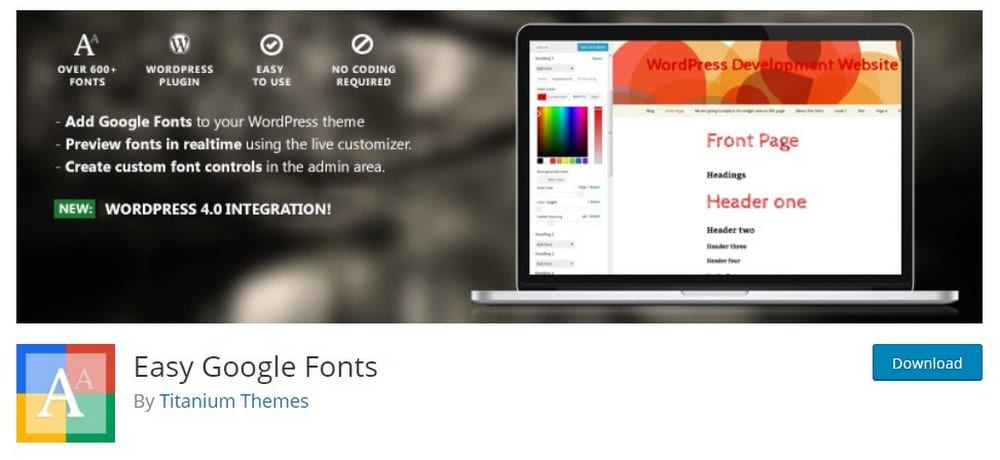
Easy Google Fonts is a free plugin that you can install on your WordPress website to easily change the website font. The plugin allows you to choose from hundreds of custom fonts available on Google Fonts and easily customize settings to match your preference.
Typekit Fonts for WordPress
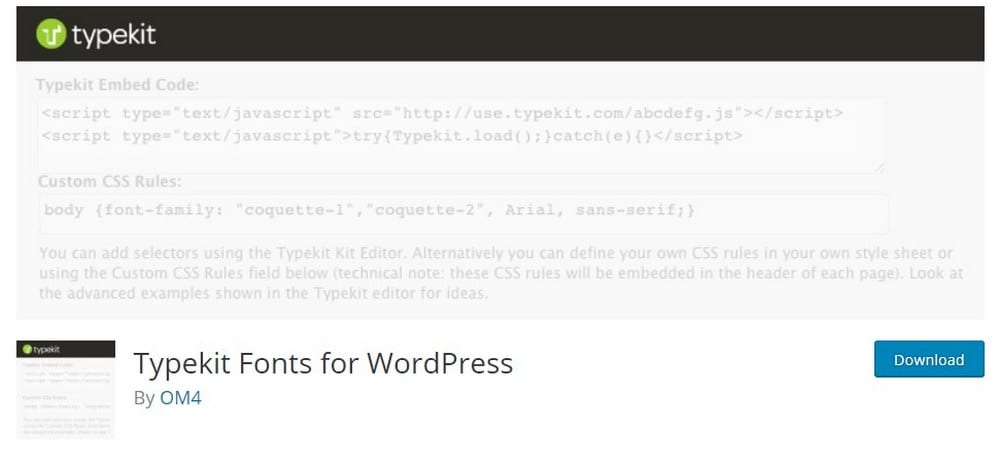
If you’re a fan of Adobe Typekit fonts, then you can use this plugin to easily switch your website’s default font to a custom font from Typekit. Adobe Typekit offers a free plan with limited access to its fonts collection.
2. Edit Theme Header.php
If you want to install a font from a different site or don’t like installing plugins, you can manually edit your WordPress theme files to add the font by editing the Header.php file. This method will also ensure faster loading times for your website.
Step 1: Go to the website where the font is hosted.
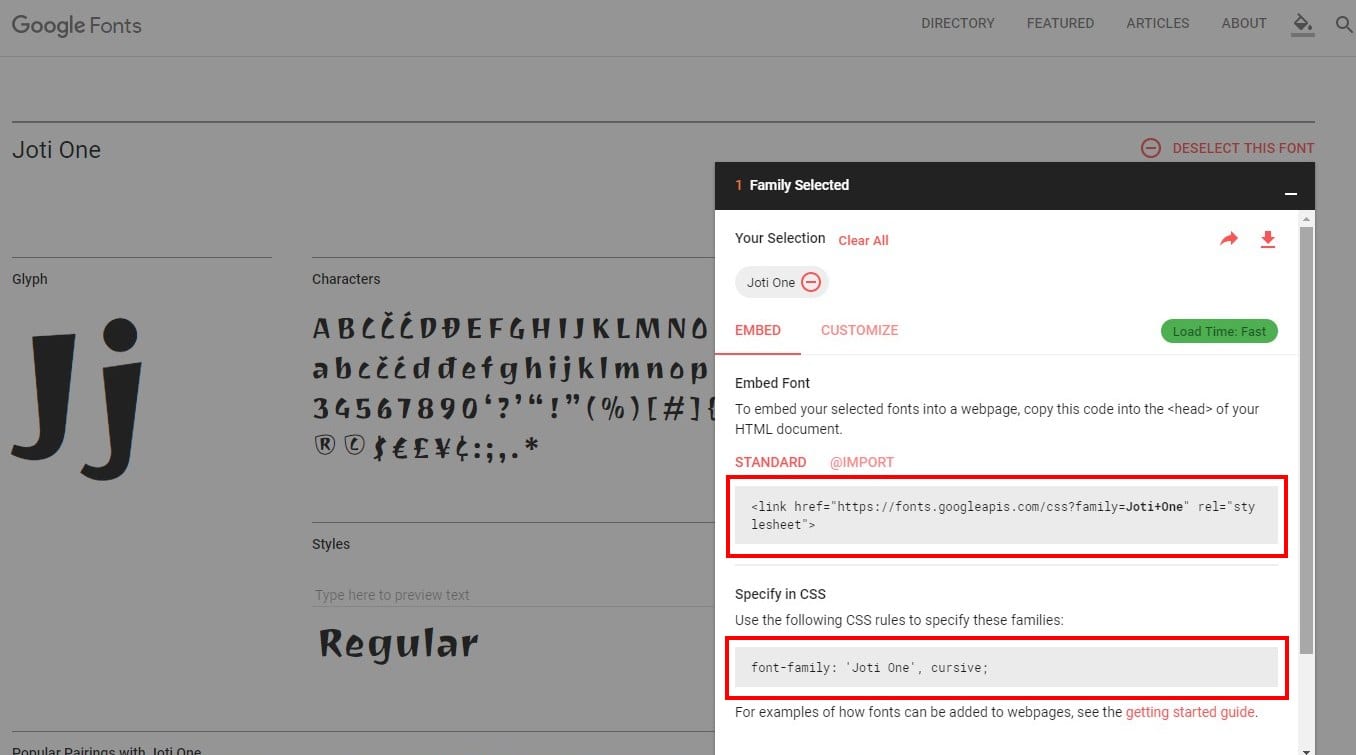
Choose the font you want to use and copy its embed code.
Step 2: Now, go to your WordPress Dashboard > Appearance > Editor. Then open the Header.php file of your theme.
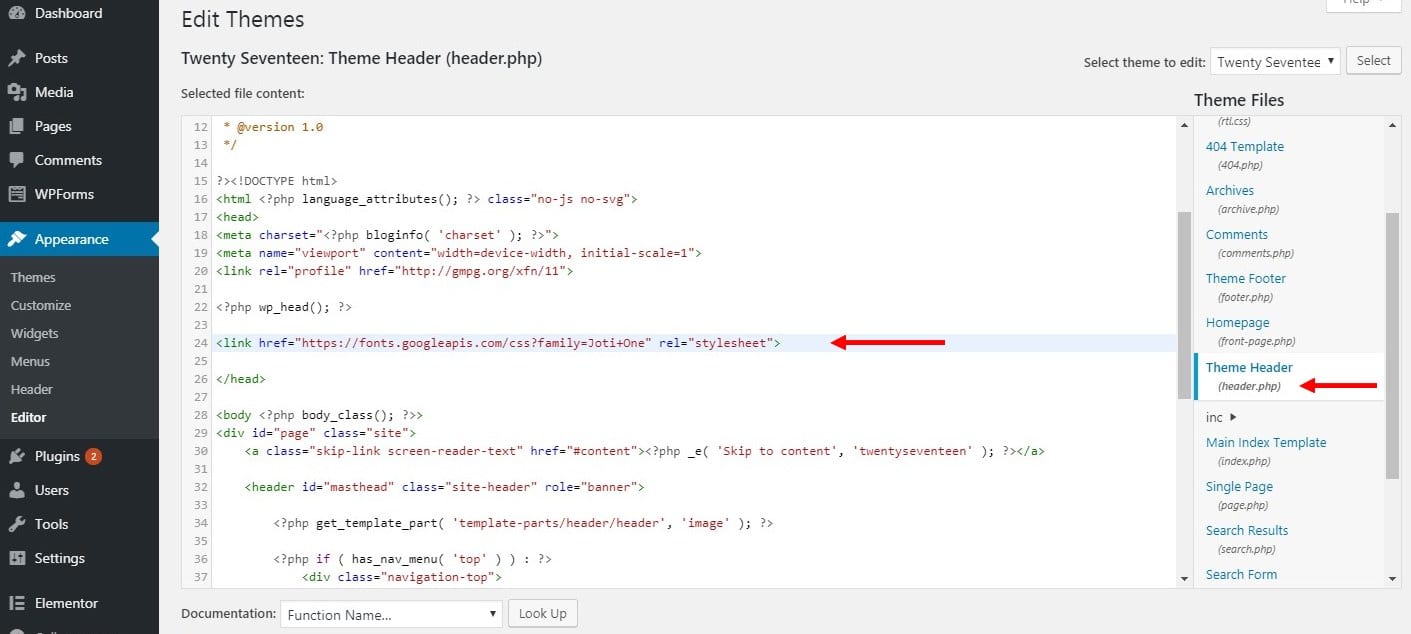
Step 3: Paste the embed code you copied for the font in your header.php file right after the <head> tag and before the closing </head> tag. Then Save changes.
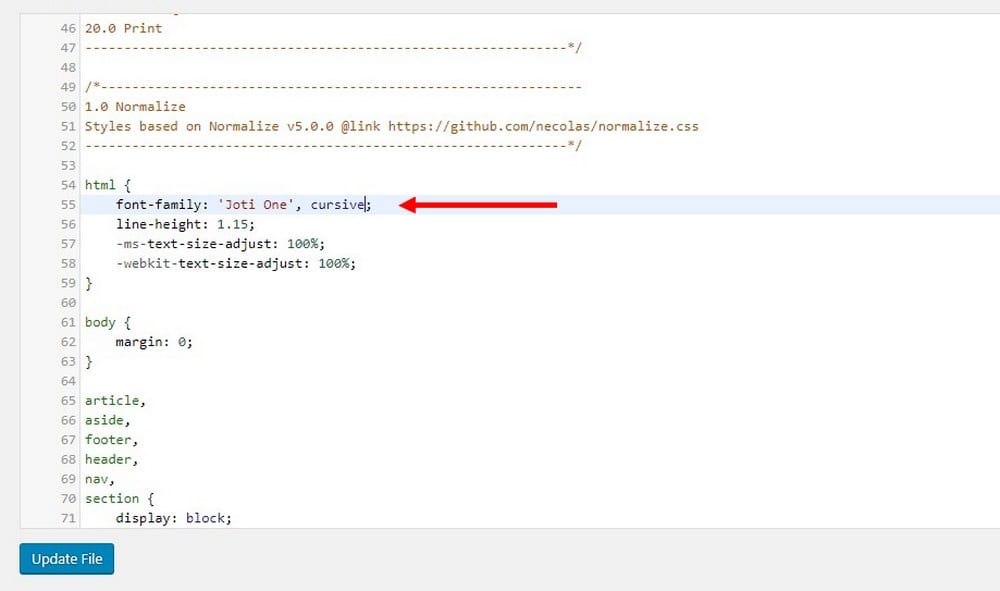
Step 4: Find and open the Style.css file of your WordPress theme. It’s located in the same section where you found Header.php.
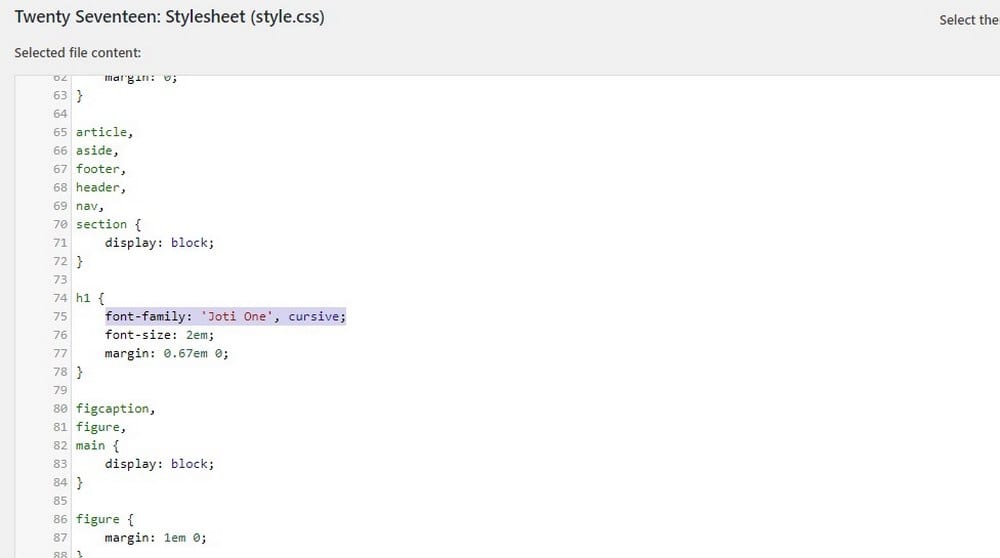
Step 5: Locate the CSS code that defines the default font family of your website and replace its font name with the name of your custom font. Save the changes.
Do the same for any other elements the font is defined, like for headers, body text, and menus.
3. Import Via CSS
You can use the CSS import function to use a custom font that you’ve downloaded from a third-party marketplace or a website like Creative Market or GraphicRiver. Here’s how it works.
Step 1: After downloading your custom font, upload it to your website server using an FTP client or the File Uploader in CPanel.

Step 2: In the FTP client, right-click on the uploaded font file, go to File Names, then click on Generate File URL to copy the address to your font file.
This will copy the root URL of your font file. Replace the root address with your website URL. (Eg: http://www.yourdomain.com/wp-uploads/others/font.ttf)
Step 3: Now, go to Appearance > Editor > and open your theme’s Style.css file and copy-paste the following code.
@font-face {

font-family: Aclonica;

src: url(http://www.yourwebsite.com/wp-content/fonts/custom-font.ttf);

font-weight: normal;

}
Change the name of the font and the src URL with the one for the font file on your server.
Step 4: Change the default font family with your custom font.
Change the font name for any other elements the font is defined as well. Then Save the changes.
What’s Next?
That’s it! Your website will now sport a beautiful custom font.
Also, if you’re using any caching plugins, be sure to clear/delete the cache for the changes to take effect.
Do you know any other ways to install custom fonts? Let us know in the comments.