How to Add Google Analytics to WordPress
Google Analytics is a must-have tool for every website. Knowing how your website generates traffic, where your visitors come from, learning what type of content they like is an important part of developing a successful website.
This free website analytics tool helps you understand what type of audience you have, and figure out what kind of content you should create to get more visitors to your site.
Even though Google Analytics dashboard is fairly easy to learn and use, adding Google Analytics to a WordPress website can be a bit confusing. In this post, we’ll explain how to add Google Analytics to WordPress in a few different (but simple!) ways.
Why Use Google Analytics In WordPress?

Google Analytics is the ultimate growth hacking tool that most bloggers and website owners rarely use. This tool offers a wide variety of ways you can leverage website traffic data to maximize your website’s potential.
For example, using analytics data, you can figure out what type of keywords and search phrases your website visitors type into Google before visiting your website. Or learn which blog posts perform the worst so that you can improve them for better interactions.
This helps you to create more effective content targeting keywords that work best for your niche and make the most of the existing content on your website. That’s just one of the dozens of ways you can use Google Analytics to your advantage.
To get started, follow either one of these methods to integrate your WordPress website with Google Analytics.
Method 1: Manually Add Google Analytics
Manually adding Google Analytics to WordPress requires editing your WordPress theme files and copy-pasting a script code provided by Google. While it sounds complicated it’s really easy to do and allows you to setup analytics without having to install additional plugins that slow down your website.
We assume that you’ve already registered for a Google Analytics account. If not go ahead and sign up. It’s completely free to use.
Follow the steps below to add your website to Google Analytics.
Step 1: Add A New Property In Google Analytics
The websites you add and manage in Google Analytics are called properties. To add your website to Google Analytics, you need to create a new property.
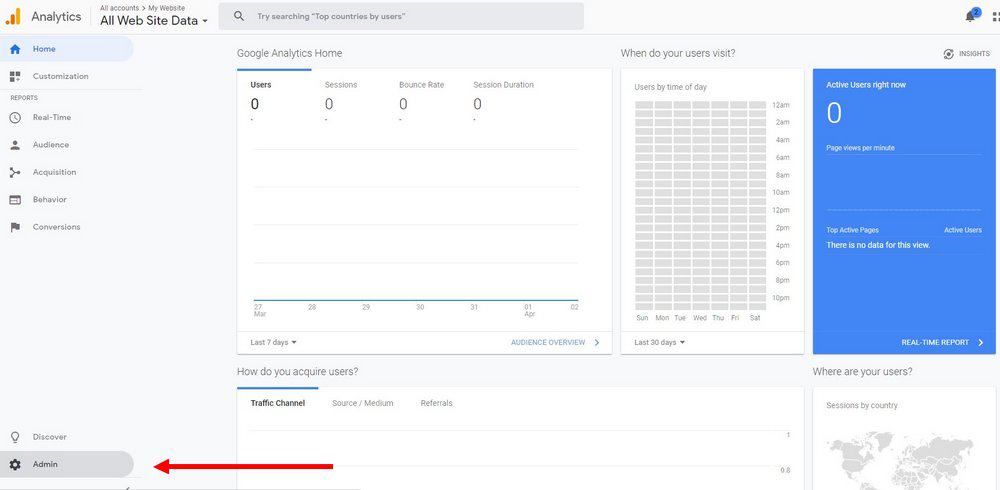
If you’re new to the platform, it will guide you through this process when you signup. If you already have an account, you can add a new property by clicking on the Admin button on the dashboard.
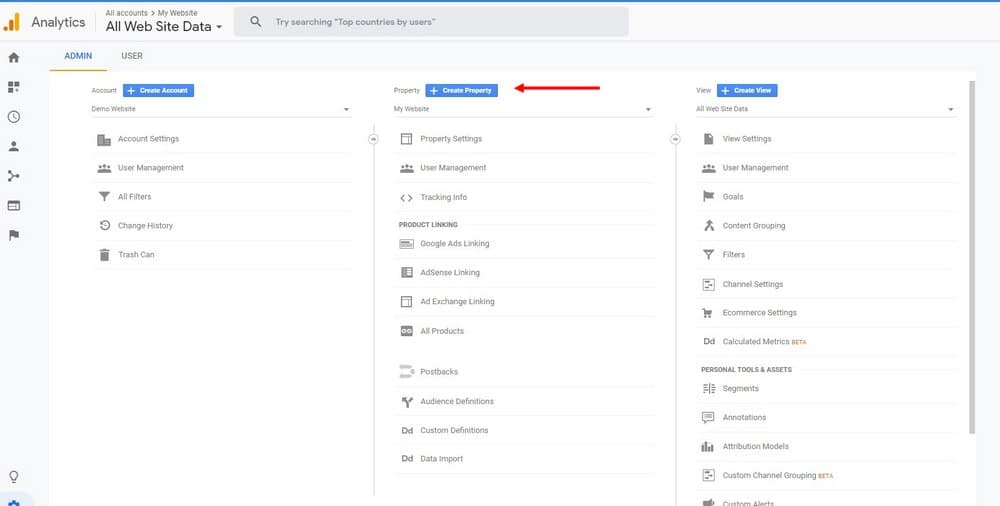
Then choose Create Property to add a new website. Simply add your website information and URL in the appropriate form fields to create a property.
Step 2: Copy The Tracking Code
Once you create a new Property in Google Analytics, it will give you a tracking code. You need to copy and paste this code in your theme file.
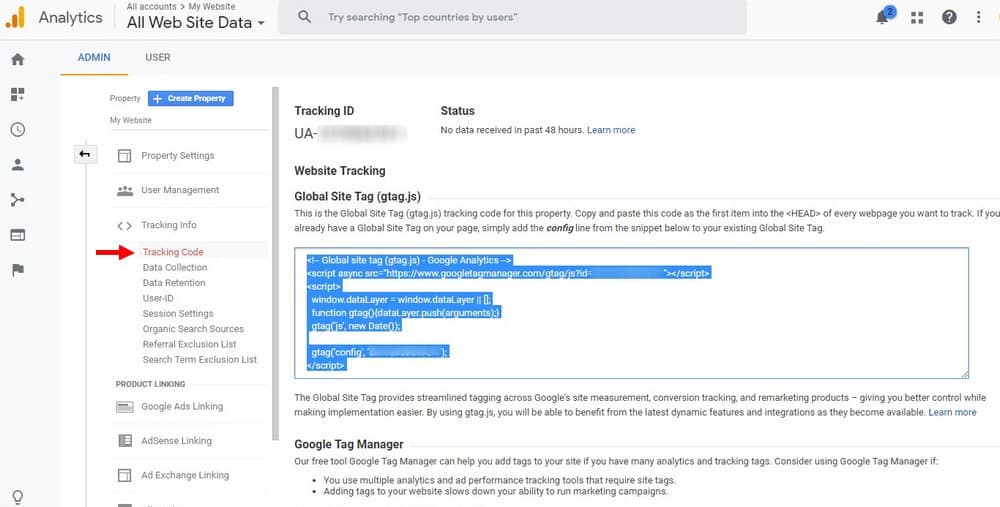
To copy this code, click on the Admin button on the Google Analytics dashboard. Then navigate to Tracking Info >> Tracking Code.
Select and copy the Global Site Tag script code.
Step 3: Edit Theme Header.php
To complete the integration, go back to your WordPress admin dashboard and navigate to Appearance >> Theme Editor and then open the Theme Header (header.php) in the editor.
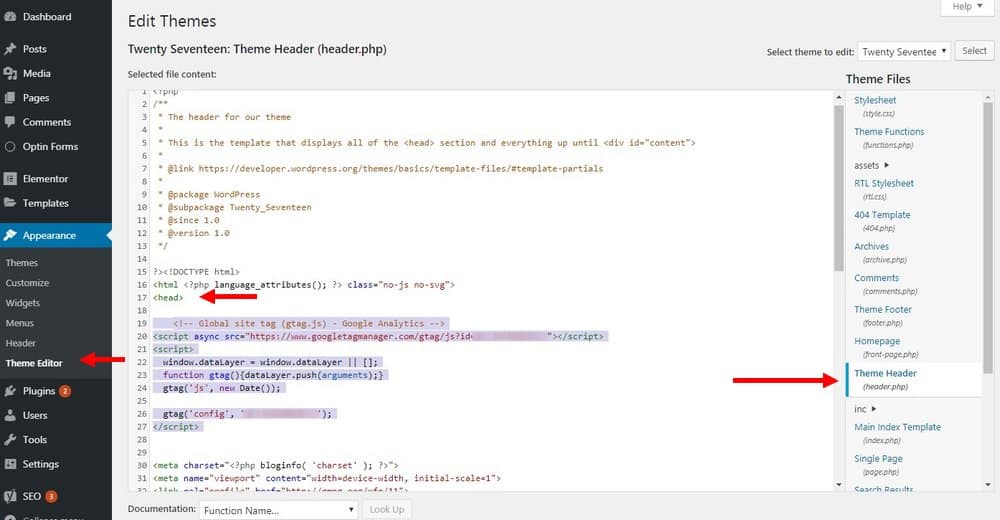
Find the <head> tag in this page and paste the tracking code you’ve copied from Google Analytics right after the <head> tag.
Click on the Update File button to save the changes and you’re good to go.
Now Google Analytics will start tracking every page on your website to collect visitor data. You’ll see the data appear on your Analytics dashboard in a few minutes.
Method 3: Use MonsterInsights Plugin
MonsterInsights is a free WordPress plugin that allows you to manage your Google Analytics account directly from the WordPress dashboard. The plugin, however, helps you do more than just installing Google Analytics on your website.
With MonsterInsights, you can not only track website visitors but you can also track button clicks, track affiliate link clicks, track downloads, and do much more.
When using this plugin, you can add Google Analytics to your WordPress website with just a few clicks without having to copy script codes or editing theme files.
Step 1: Install Monster Insights

Login to your WordPress dashboard and go to Plugins >> Add New.
Search for Google Analytics Dashboard Plugin for WordPress by MonsterInsights and Install the plugin.
Step 2: Connect Your Google Analytics Account
Once you install the plugin and click on the Activate button, MonsterInsights will help you set it up by walking you through a step by step process.

In the second step, the plugin will ask you to connect your Google Analytics account with MonsterInsights. Click on the Connect button and authenticate MonsterInsight to allow access to your Google Analytics account.
After connecting the account, simply continue through the setup process. If you’re a beginner, stick to the default settings. You can always change them later.
MonsterInsights plugin comes with lots of great tools you can use to your advantage, especially for eCommerce websites. Be sure to test them out.
Method 3: Use Google Tag Manager
Google Tag Manager is a useful tool you can use to manage all your tracking tags in one place. This tool is especially useful if you regularly update your website theme designs and use multiple tools and services like Google Analytics, Google Adsense ads, and even tools from other third-party services.
When using Tag Manager, you only have to paste one code in your Theme Header file and then you can add and manage all the other tracking codes directly from the Tag Manager dashboard. This makes things much easier when changing accounts and updating themes.
Step 1: Setup Tag Manager
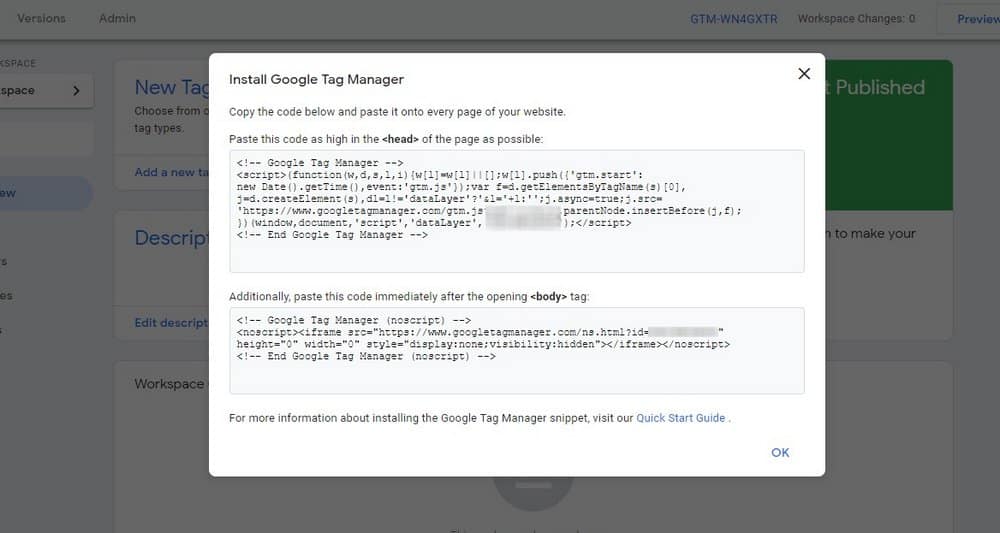
Tag Manager is a free tool. Signup for an account and then add your website. Copy the tracking scripts from the Tag Manager and then paste them after your Theme Header (header.php) file’s opening <head> tag and the other noscript code after the opening <body> tag (see method 1 instructions).
Step 2: Add New Tag
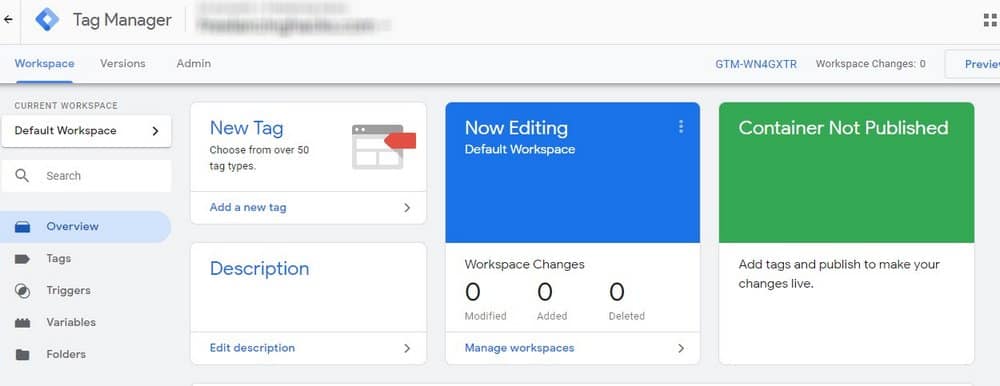
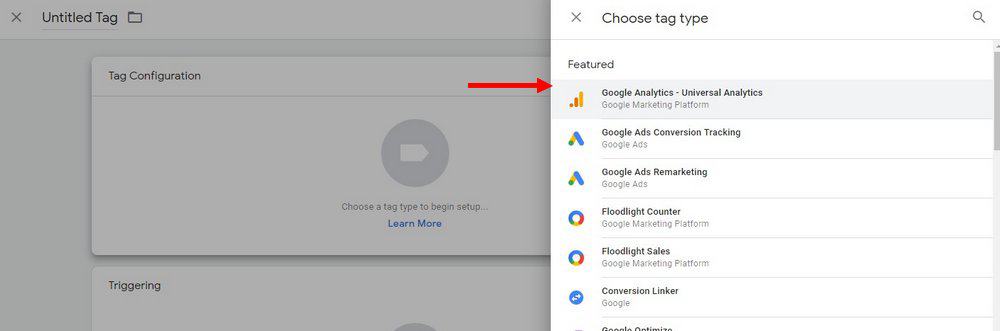
Now you can start managing your tracking codes in the Tag Manager. To add your Google Analytics account in the tag manager, click on create New Tag button and choose Google Analytics from the list of tags.
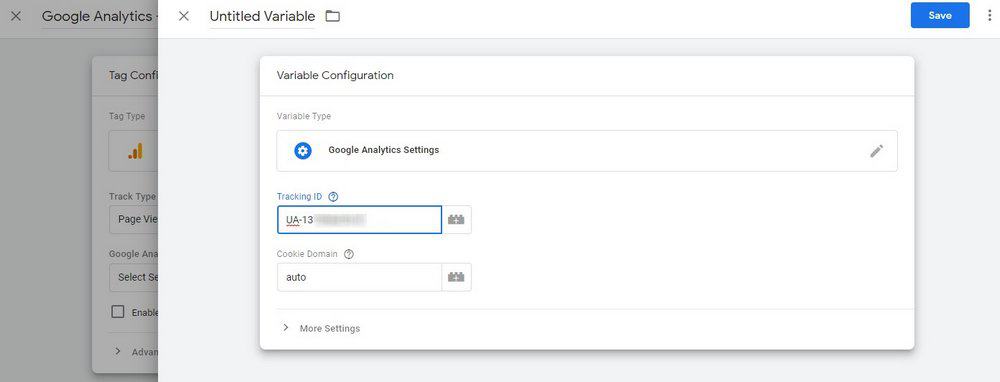
In the Google Analytics Settings section choose to add New Variable and copy your Google Analytics tracking ID.
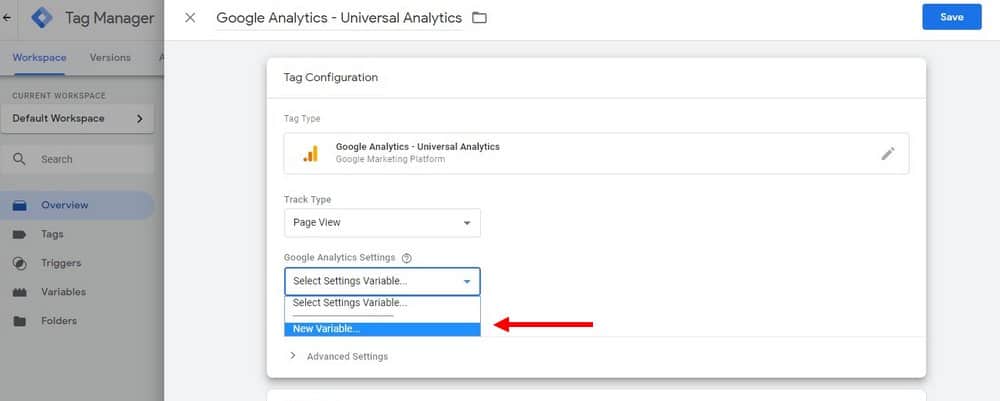
You can find the tracking ID by visiting Google Analytics dashboard and clicking on the Admin button and on Property Settings page.
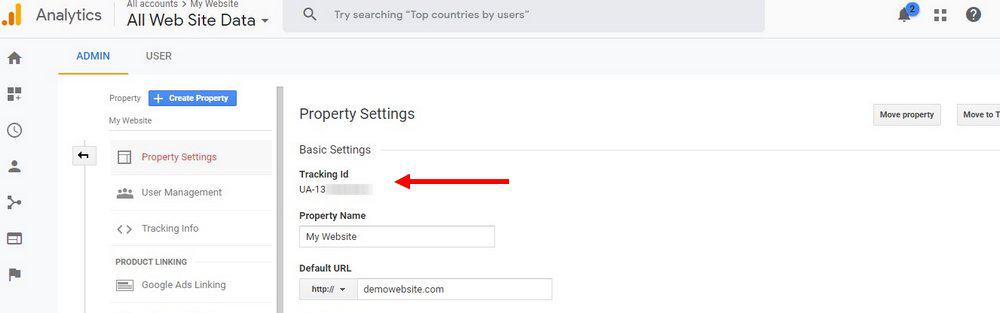
Once you copy-paste the ID, Save the Variable.
Then choose All Pages as your tag’s trigger.
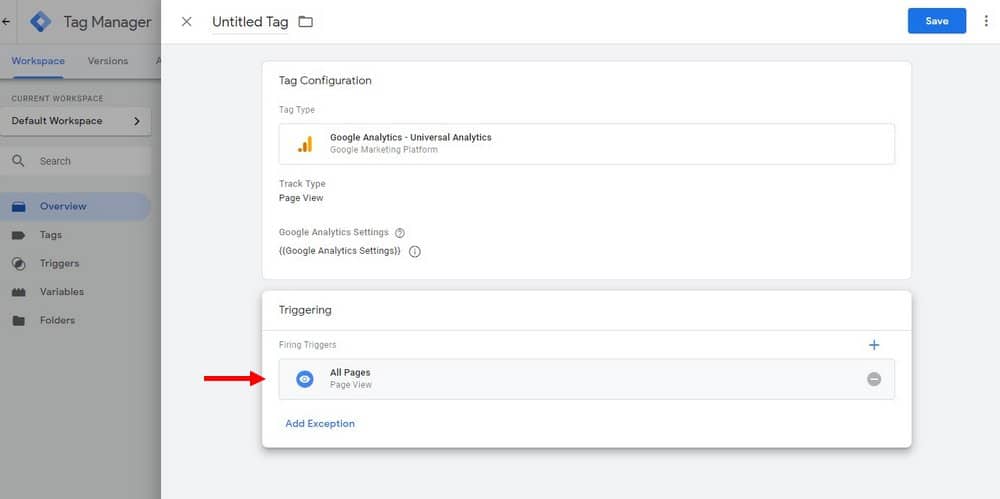
Give your tag a name and save the tag. That’s it!
This method may be a bit too advanced for beginners, but it will make your life a lot easier when managing multiple blogs or websites.
In Conclusion
To make the most of Google Analytics, connect your Search Console and Google AdSense Ads accounts with Google Analytics to get more insights into how your website ranks on Google and get better data about your ad performance.
Looking for WordPress hosting? We use Kinsta. They offer world-class WordPress hosting, built to keep your website fast, secure, and always online.