8 Visual Composer Tips You (Probably) Haven’t Seen Before
Visual Composer is one of the most popular page builder plugins available on WordPress today. It’s not only an affordable plugin, but it also comes with a beginner-friendly visual interface that allows almost anyone to build custom pages in WordPress without any web design experience.
There’s so much you can do with this page builder plugin. You can design landing pages, sales pages, custom about pages, contact forms, portfolios, galleries, and much more. And that’s just scratching the surface of what you can do with this plugin.
Most Visual Composer users are still unaware of the true power of this page builder. In this post, we share some of the cool and lesser known tricks for making the most of Visual Composer. See if you know any of them already!
Tip 1: Create Your Own Shortcodes
Shortcodes are a useful feature that comes integrated with WordPress to let you add more to your pages and themes with ease. So, what if you could create your own shortcodes to easily manage your website?
Visual Composer comes with a built in Shortcode Mapper that allows you to create your own shortcodes and control parameters using the plugin to make your page building process much easier.

You can add shortcodes by going over to Visual Composer Settings page and then from the My Shortcodes tab.
Tip 2: Add Custom CSS To An Element
Visual Composer is a page builder anyone can use without having to write code. Most of the elements that come with the plugin are fully editable. However, if you need to add custom CSS to a certain element to design it your own way, then you can do that too.
Here’s how.
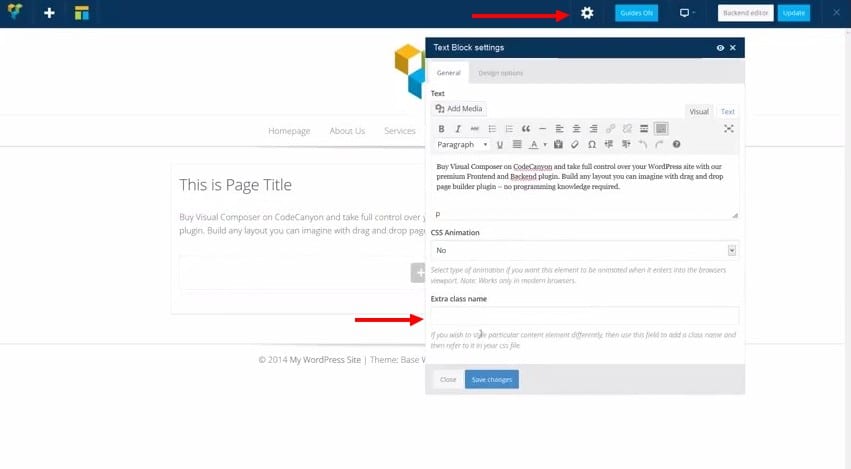
- First, assign your element a CSS class via the element’s settings tab
- Go to Page Settings and then insert your custom CSS under the assigned CSS class.
Tip 3: Manage Who Can Use Visual Composer
If you’re running a WordPress website with multiple users and several admins, then you might want to restrict the access to Visual Composer only to users of your choice. This will ensure that users can’t destroy your page designs by accidentally editing your custom designed pages.
Luckily, Visual Composer comes with advanced user role management to let you manage plugin access and limit its features to specific users accordingly. For example, you can allow blog editors to only edit Visual Composer text block elements and grant full access to admins.
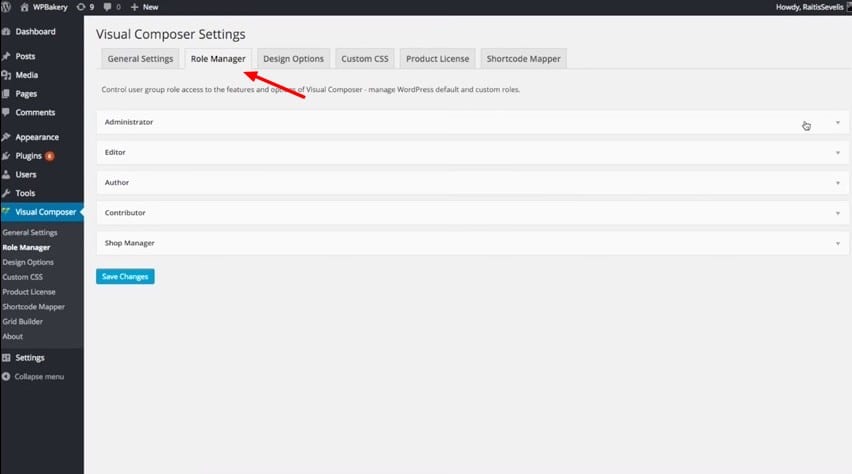
To setup user roles for Visual Composer, go to Settings and Role Manager tab and customize settings for different users.
Tip 4: Save Your Designs For Later Use
If you’re a web designer or a blogger who create tons of landing pages and custom designs, then you can use Visual Composer to save hours of your time that goes into designing new pages with the help of Templates.
Visual Composer allows you to save blocks of your page designs as Templates for later use. This way, you can save headers, footers, and other common content blocks as templates to use when you’re building new pages.
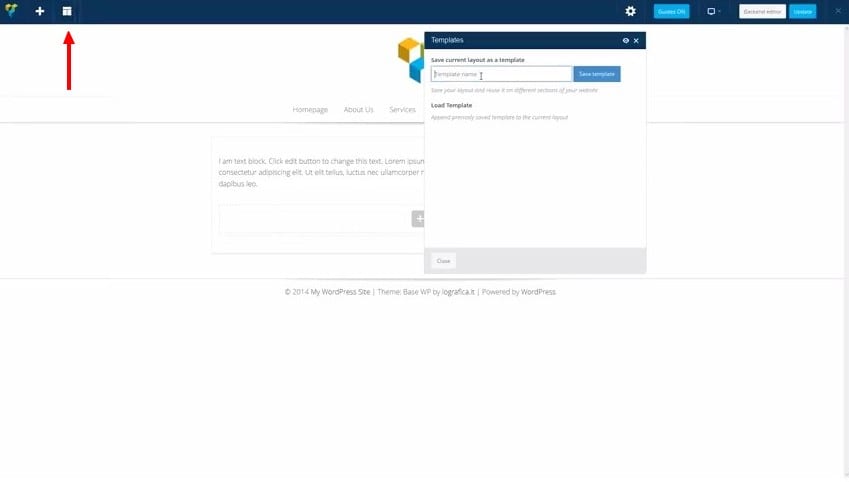
Simply click the Templates button in the top right-hand corner and choose to save your current layout as a template.
To take things to the next level, you can get the Templatera add-on for Visual Composer. This plugin extends the features of the Visual Composer templates system.
Tip 5: Customize WooCommerce Product Pages
If you’ve setup a WooCommerce shop with a pre-built theme then you’ll probably be stuck with the same default product page design that ships with your theme. You can’t customize these product pages unless you know how to code.
Visual Composer solves this problem by letting you create your own unique product pages for your WooCommerce shop. All you need is the page builder plugin and the WooCommerce Single Product Page Builder add-on.
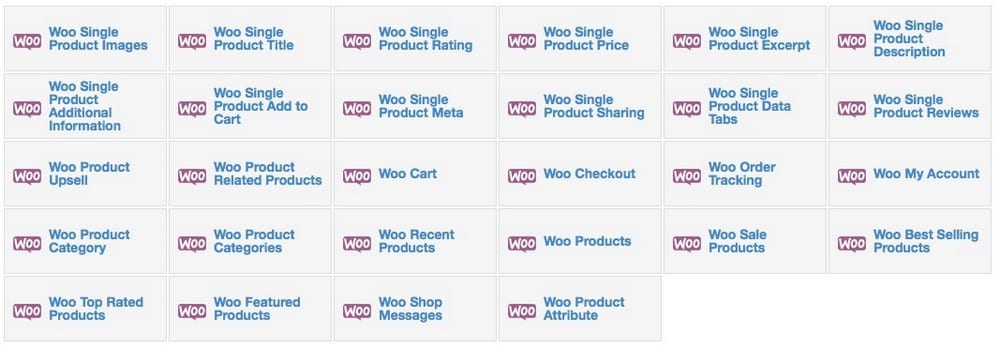
This extension will add a bunch of extra elements that you need for creating great looking product pages in your shop.
Tip 6: Custom Default Settings For Elements
Most of the Visual Composer elements needs to be always customized to match your design each time you build a new page. This can be a painful process when creating large designs.
But, you can easily edit the default presets for each element to customize them to match your design so you don’t have to change the design each time you use them.
For example, if you want the color of the buttons to be always Red and have a Flat design by default then you can edit the preset for the Button element to change the design. That way every button you add to your design will be colored Red with a Flat design.
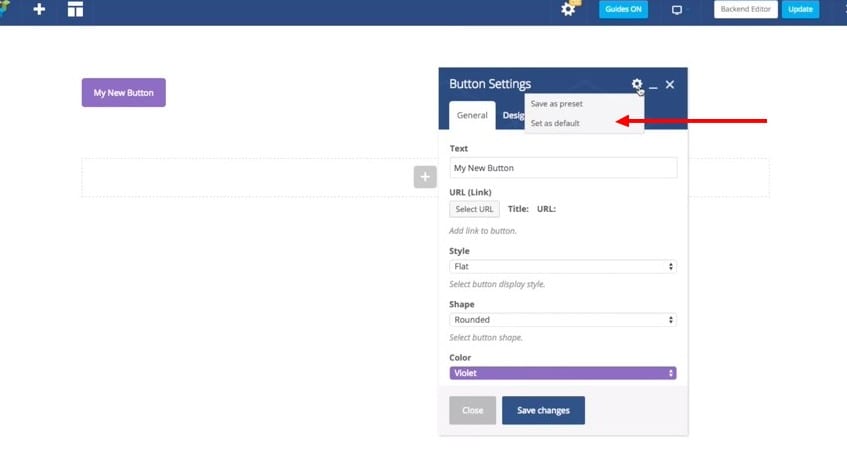
You can do this by choosing a design for the element of your choice. And then, click on the Gear icon on the settings page and choose Set As Default.
Tip 7: Add Empty Space Between Sections
Adding a lot of space between content is the key to crafting minimalist designs. Using a page builder doesn’t necessarily mean that your hands are tied to add more space between elements. Visual Composer allows you to do this with the Custom Height option.
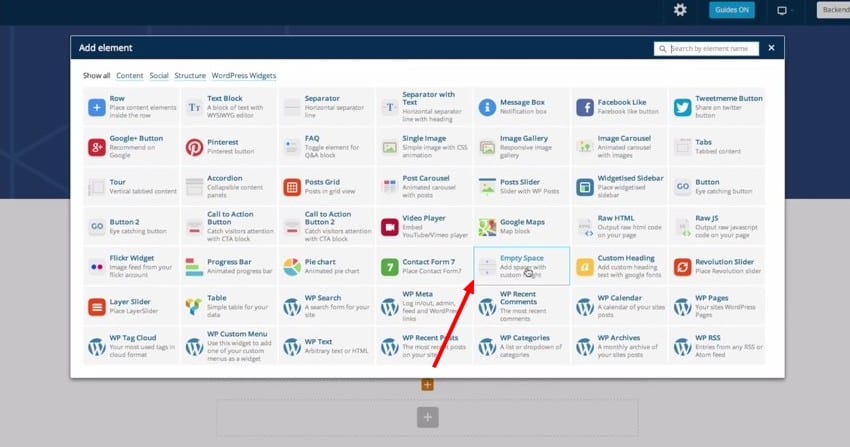
Simply choose the Empty Space element from the Visual Composer elements collection and customize its height to add as much space as you want between the elements of your design.
Tip 8: Save Space With Tabbed Content
When building special pages like a landing page, you usually have to pack a lot of information into a single page without cluttering the design. So, how do you feature all the information in a page while also keeping a minimalist look?
This is where Visual Composer Tabs element comes to help. Using this element, you can create multiple tabs inside a single column taking minimum space. It’s similar to how you open several web pages on Google Chrome with tabs.
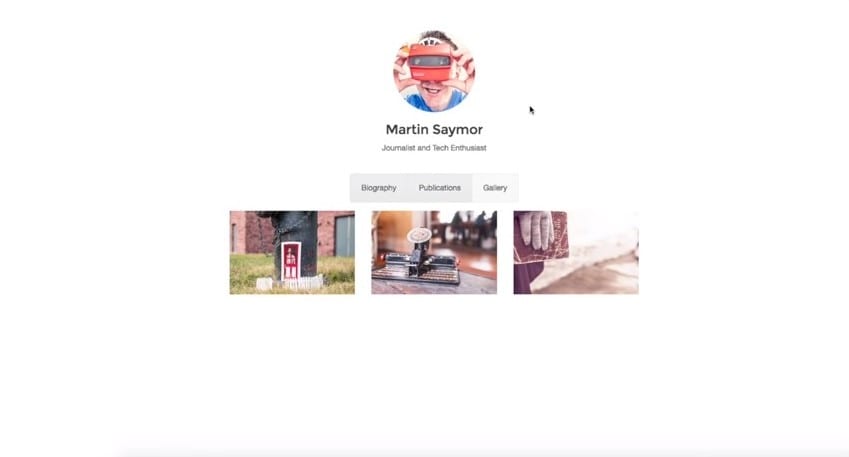
To add tabs to your design, all you have to do is create a new Row and add the Tabs element into the design. From there, you can continue adding as many tabs as you want.
And then you can insert any type of content, including text, images, galleries, and more into these tabs as well.
Conclusion
As you can see, Visual Composer can be a powerful plugin you can use to go from WordPress beginner to WordPress expert without any coding skills.
However, before you buy the plugin, make sure that your current theme supports Visual Composer. You can do that by contacting your theme developer.
Or, simply choose one of the best Visual Composer WordPress themes. These themes also come bundled with Visual Composer as well, so, you won’t have to buy it separately!